
All Artifact Locations - The Casting of Frank Stone
Explore and unlock everything The Casting of Frank Stone artifacts have to offer and discover the whole story.
The Casting of Frank Stone artifact locations can be tricky to find but are well worth it if you’re a Dead by Daylight lore enthusiast. Not only will the artifacts help you understand the world of Dead by Daylight, but the story and wibbly-wobbly timelines you’ll face throughout.
There are three sets of 10 artifacts you’ll have to collect throughout The Casting of Frank Stone. These are: The Champion, The Storyteller, and Murder Mill.
What’s confusing is that some of these collectibles are not found in order. For example, you may see an artifact labeled as the first for Murder Mill in Chapter 2 and then another artifact for Murder Mill in Chapter 4 labeled as number 6, allowing you to believe you’ve missed several collectibles. That isn’t the case at all, and you’ll likely fill out the areas you’ve missed as you progress throughout the story.
To help ease your confusion, we’ve highlighted all the artifact locations in The Casting of Frank Stone, as well as the chapter they’ll appear in.
Be warned that this guide will contain minor spoilers.
All of the Artifact Locations
The Champion Artifact Locations

Staff File
- Chapter 1: The Burning Man
- Location: The Mill
As Sam in the prologue, you will explore the inner workings of the mill in search for Frank Stone. At one section, you’ll have to remove a pallet from the door to access another area.

However, before you do that, interact with the filing case to the right. Open up the case, and, in doing so, the staff file will fall to the floor.
Symbols

- Chapter 1: The Burning Man
- Location: Furnace Tunnels
Playing Sam, you’ll eventually head into the furnace tunnels to find and stop Frank Stone. Just before you enter the furnace access, which is an unmissable area in a small and tight corridor, look to the right wall where you’ll see a couple of knives, shaped like a cross.

If you're struggling to find where they are exactly on the wall, look for a light sconce on the wall; the symbol is right under it.
Old Newspaper Article

- Chapter 5: The Phantom of Cedar Steel
- Location: Rivera Garage
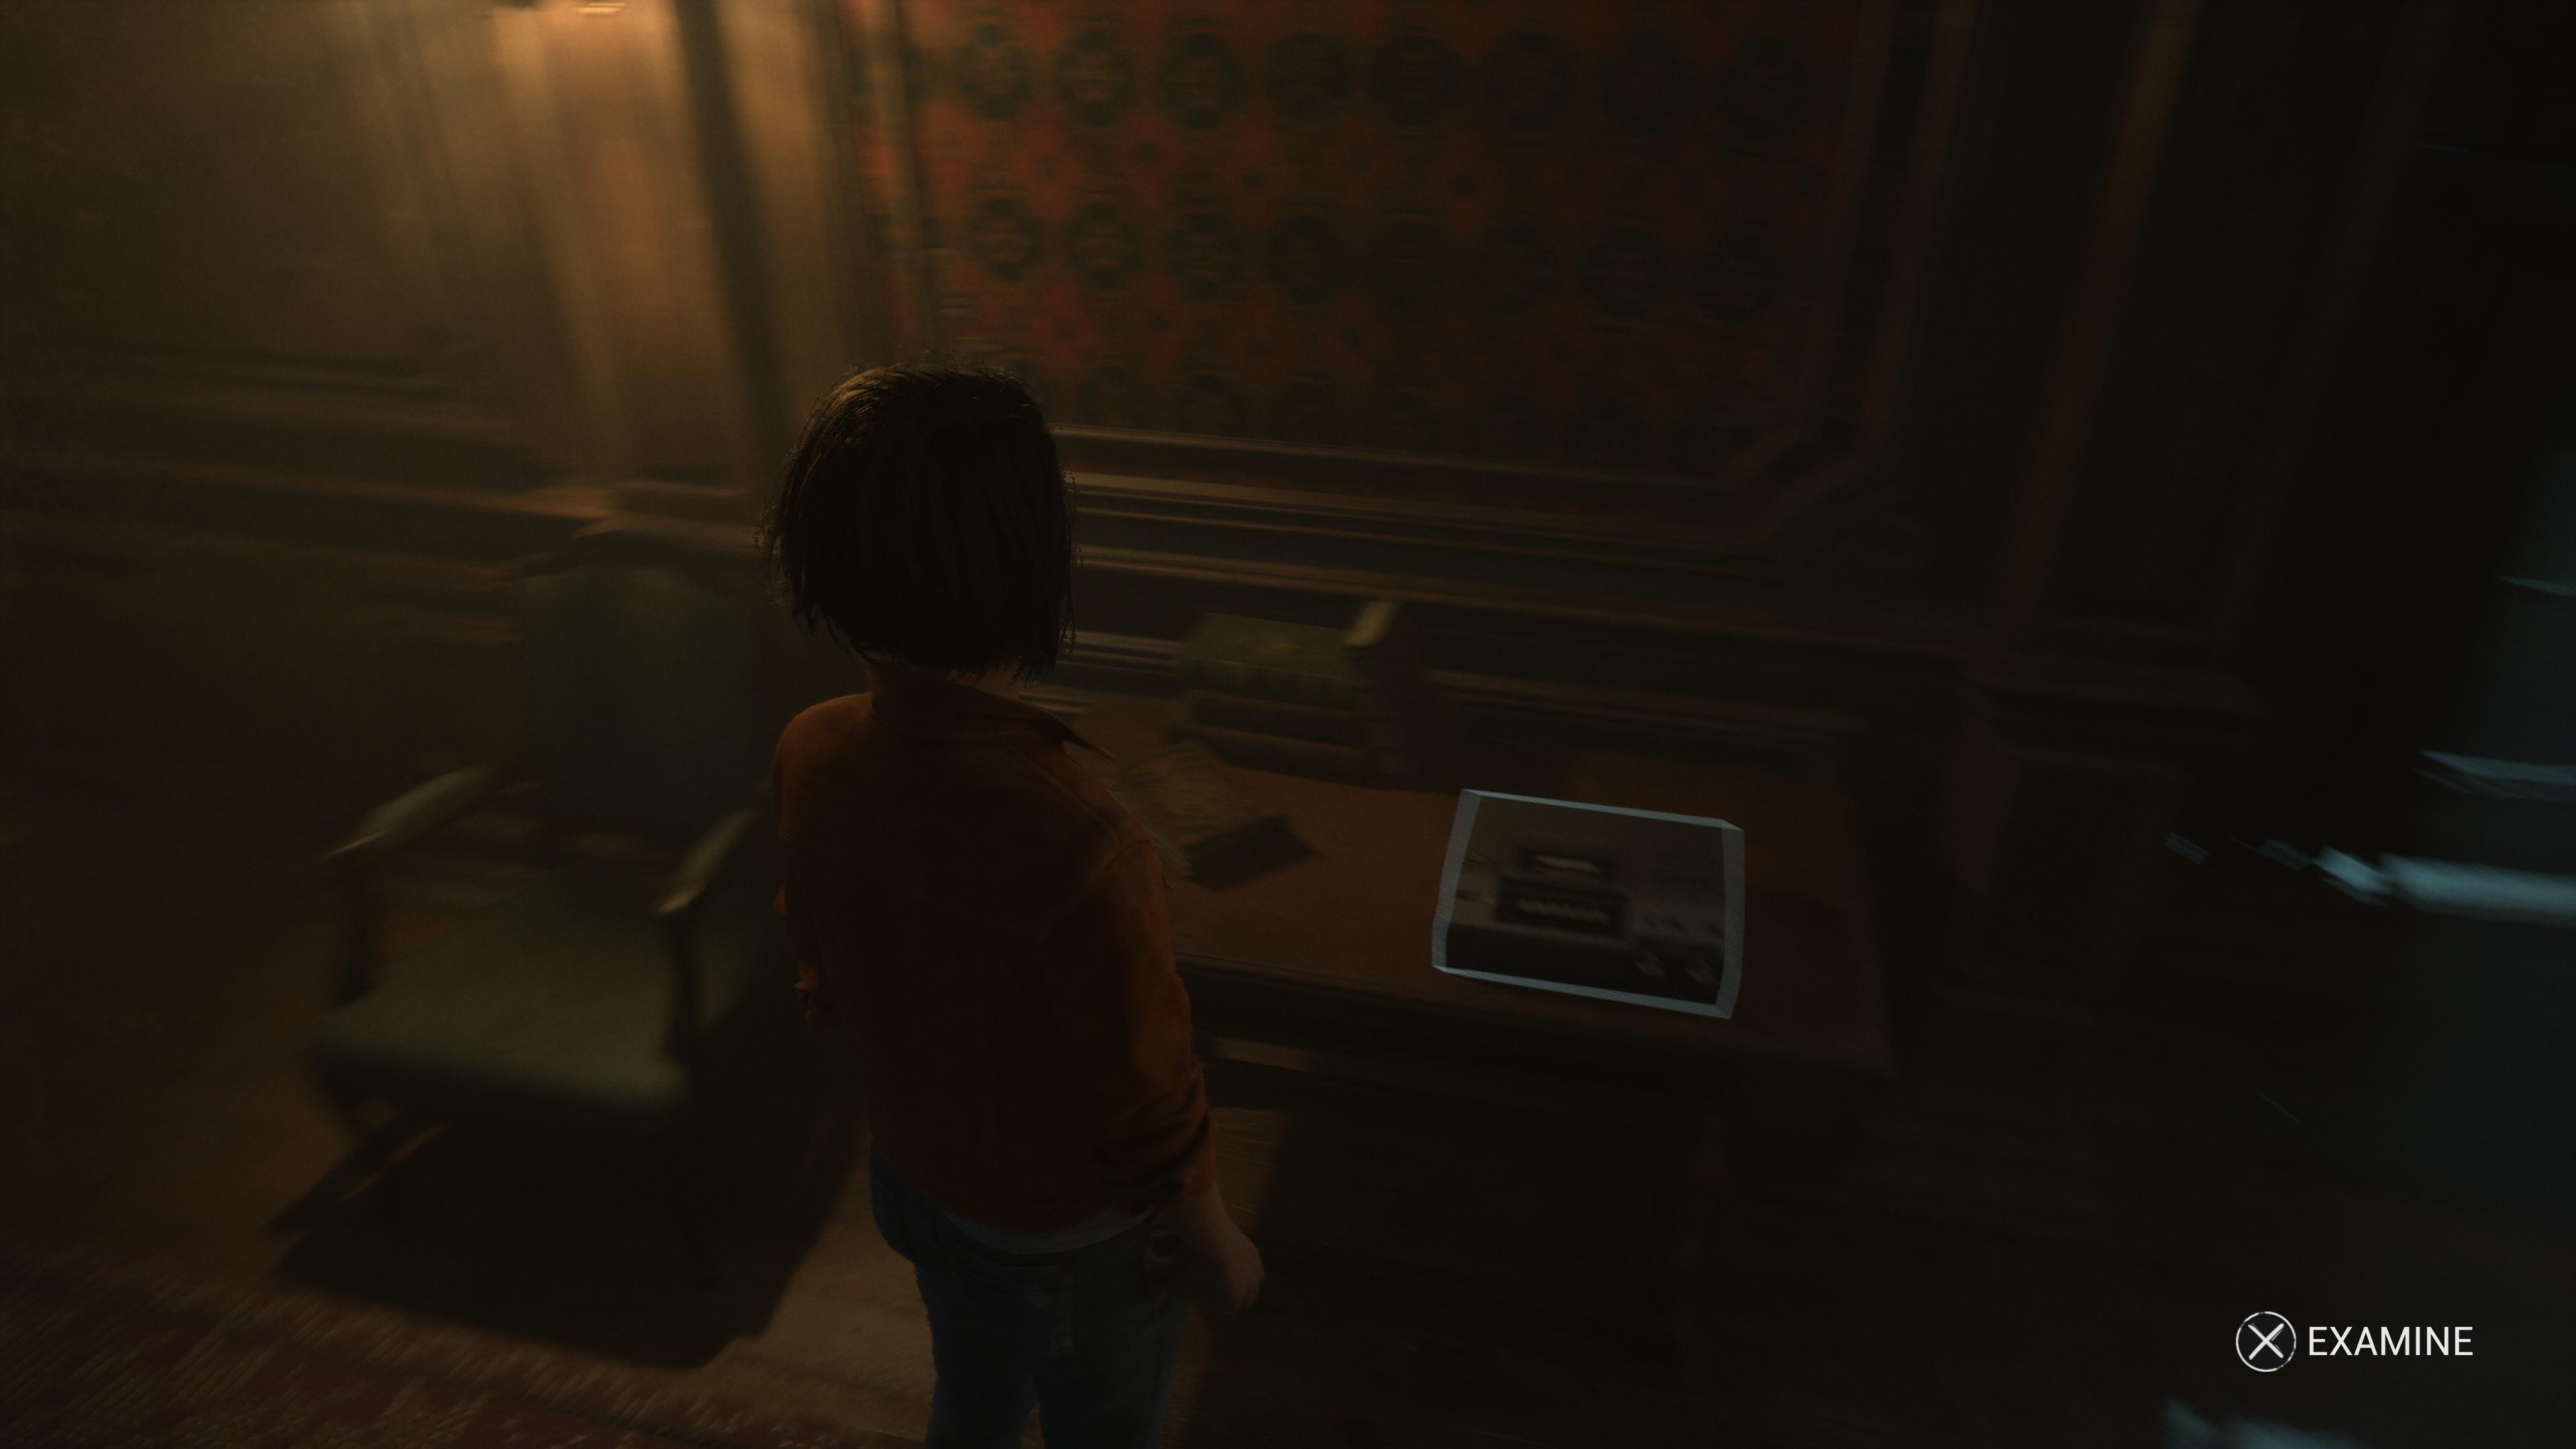
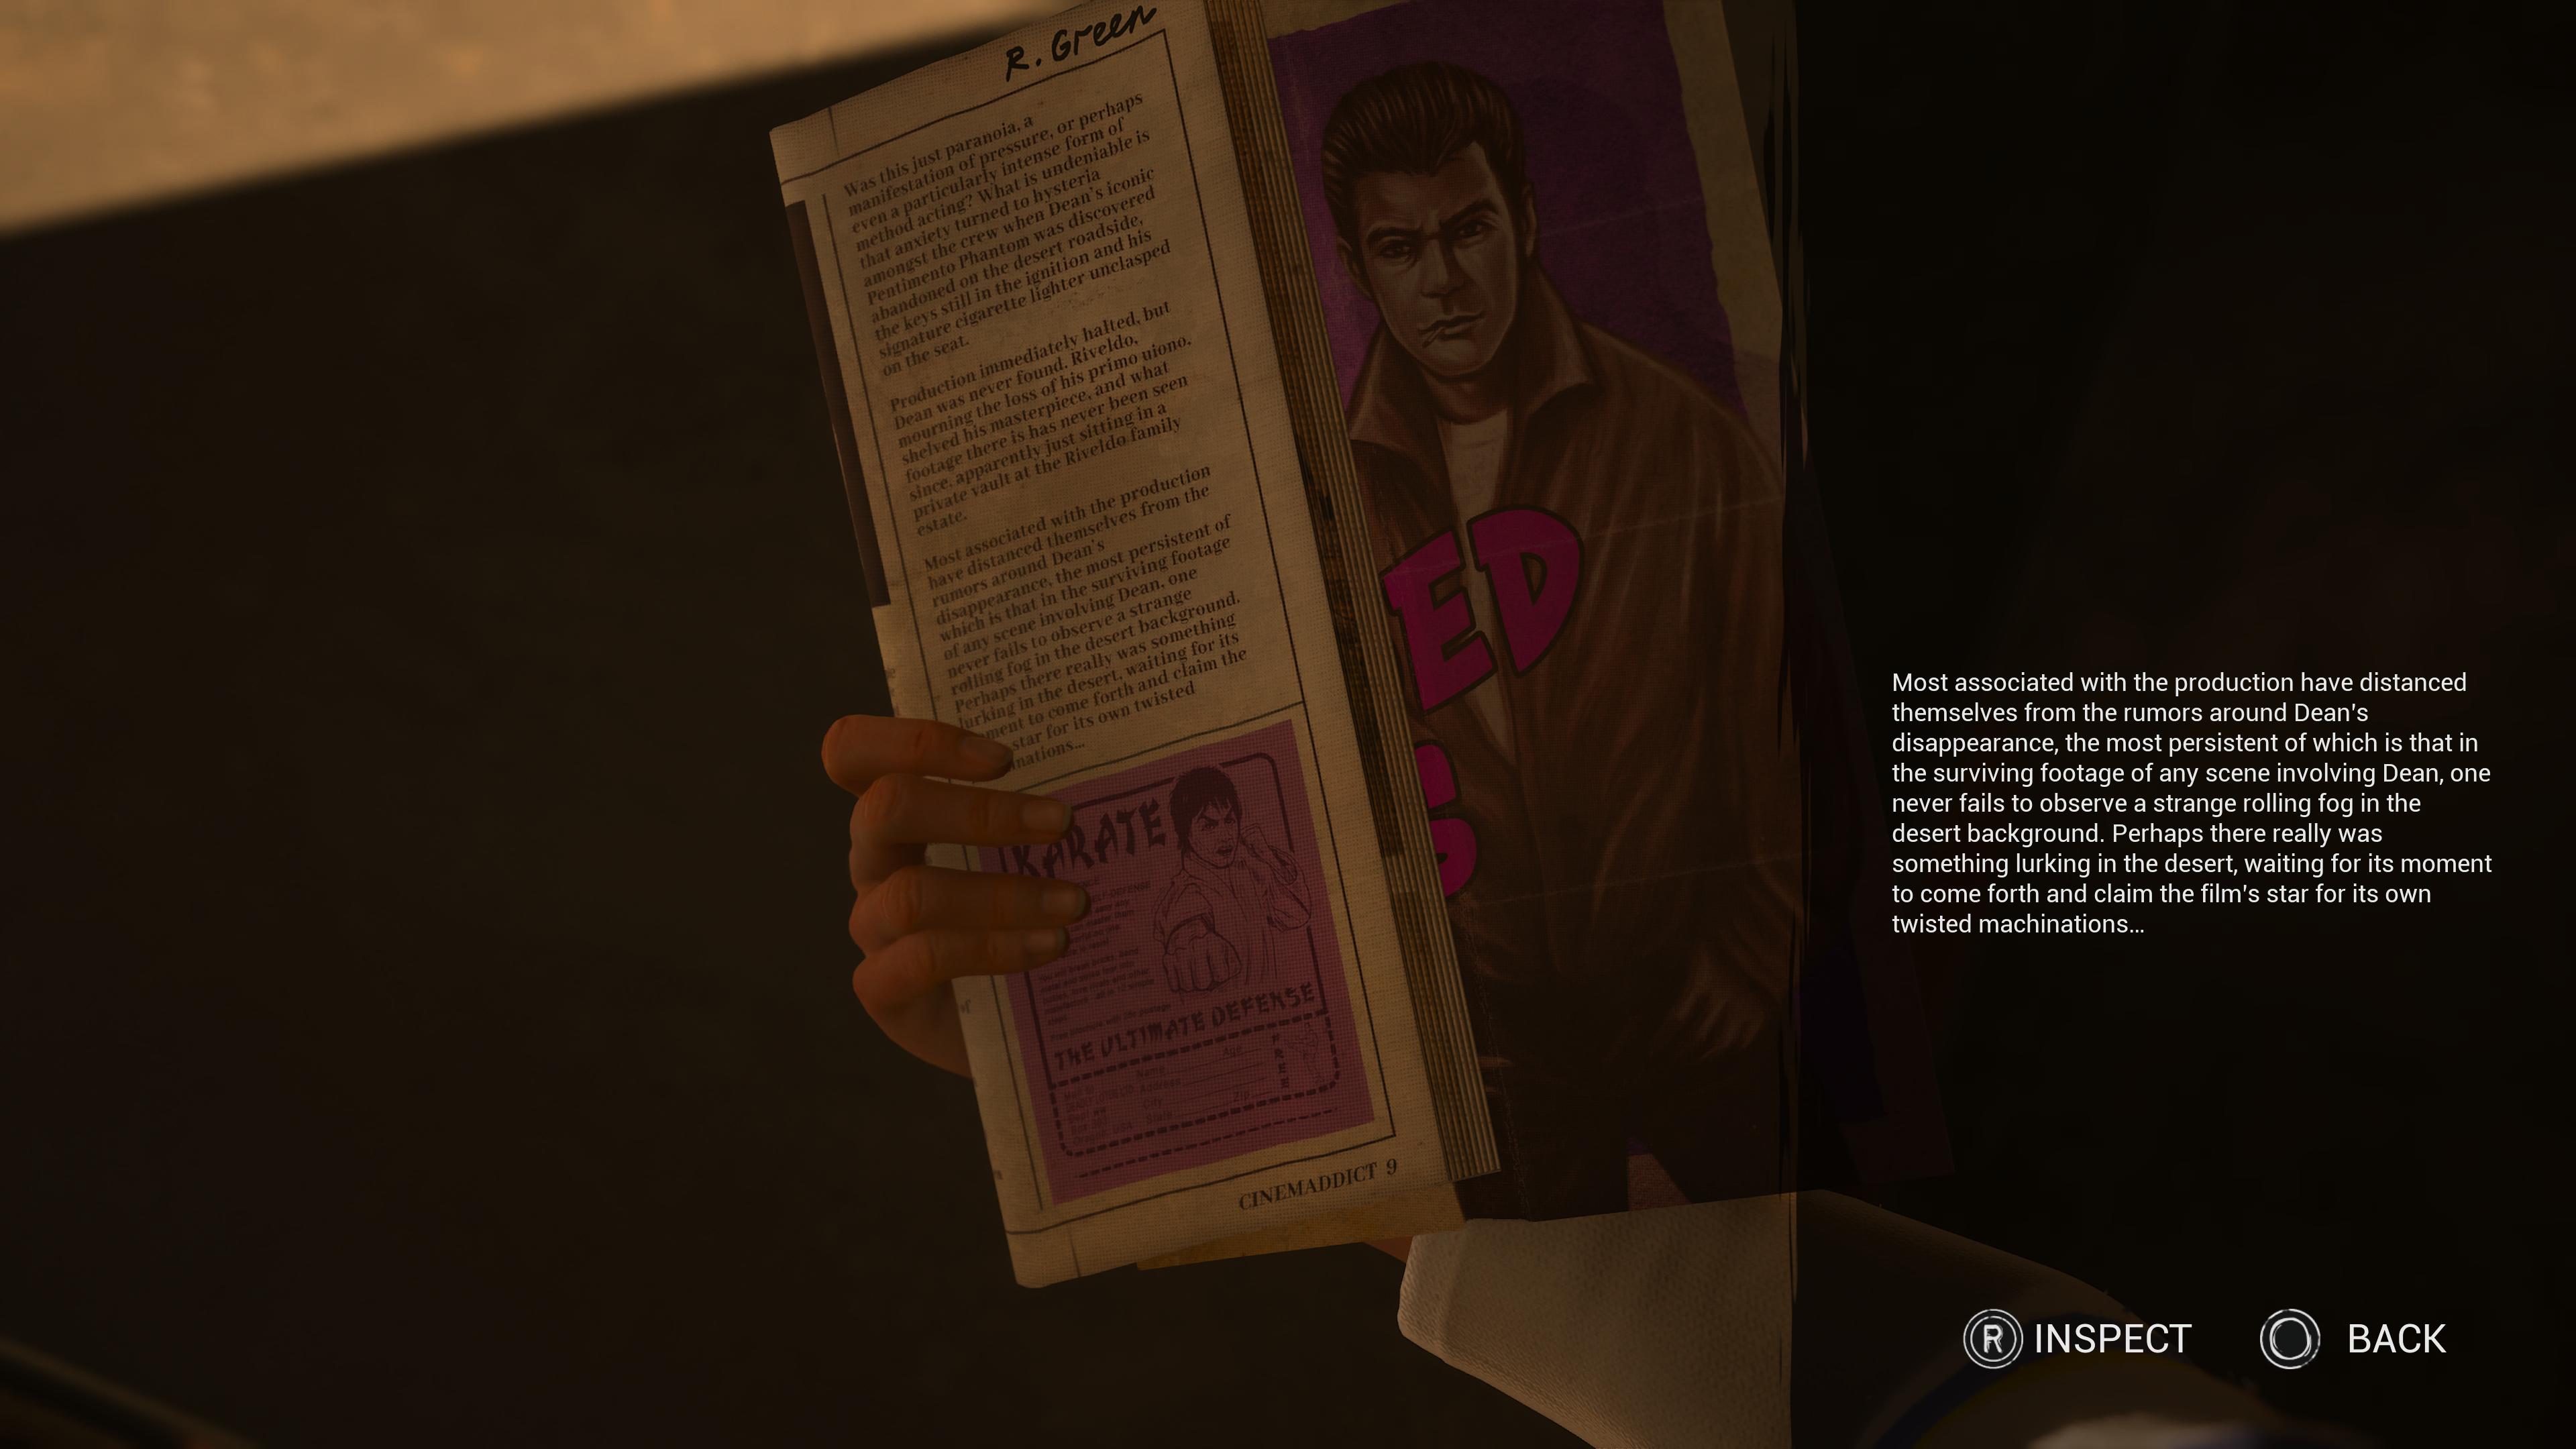
As Jaime, inside the Rivera Garage, just after Chris and Robert sit down to plan locations for the film, head to the table to the left of Robert. There, you’ll see a desk with two white pieces of paper on top of it.

Interact with the table, and you’ll read through an old newspaper article on Frank Stone.
Epic of Gilgamesh

- Chapter 4: These Walls Have Eyes
- Location: Gerant Manor Lounge
Playing as Madison, players can roam and explore the room they’re in while waiting for Augustine. Head towards the fireplace at its center, and to the table on the left you’ll see a book titled The Epic of Gilgamesh.

You must read through all of it, as it won’t count towards The Champion artifacts list otherwise.
Weapon Designs

- Chapter 5: The Phantom of Cedar Steel
- Location: Lair
Playing as Jaime, you, alongside Chris and Robert, will eventually enter the train cart that Frank Stone used as a hidey-hole for some of his more twisted experiments. While up there, there will be several items you can look at in more detail.

At the center of the train cart is a table with a notebook. Opening it reveals crude weapon designs crafted by Frank Stone.
Face of Evil

- Chapter 4: These Walls Have Eyes
- Location: Atrium, Second Floor
Stan, Linda, and Madison will continue to explore Gerant Manor and, as such, head to the atrium – a spiraling tower.

The next artifact awaits on the second floor of the atrium, where three portraits hang on the wall (with the portrait at its center being The Artist from Dead by Daylight). Below these portraits is a table where a lone book titled ‘The Face of Evil’ sits. Interacting with it will unlock the artifact.
Grandmother’s Letter

- Chapter 9: Descent of the Damned / Hunting Ground
- Location: Locker Room
Players will progress throughout this chapter as normal, but must pay extra attention when they enter a room with lockers at the far end of the wall.

Players will uncover a disturbing letter addressed to F.Stone from his grandmother inside the locker. This is impossible to miss, as players will need to search one of these lockers for a part to progress into the next area.
Frank’s Journal

- Chapter 9: Descent of the Damned / Hunting Ground
- Location: Cedar Mill Tunnels
Players will eventually head down into the tunnels under Cedar Mill. Keep on going until you see a ladder that allows you to ascend into the next area – you’ll know it’s the right one because when you go to interact with it, it will warn you that there’s no way to come back from this area.

Instead of going up the ladder, turn back down the corridor you came from, with your gaze directed to the left of you. At the first door, you see (not the second, as that door will be locked) head through it and you’ll see a crawl space at the very bottom.
Go through it, and continue until you end up in another room. In front of you will be a table with Frank’s journal resting on top.
Session Tape

- Chapter 12: Closing the Noose
- Location: Cedar Mill Tunnels
Playing as Madison, players will discover a secret passageway while exploring the bedroom alongside Stan, and others. As this is part of the story progression, it will be impossible to miss, but to sum it up: you find a key and insert it into the music box on the cupboard to open the passageway.

Once it is opened, head down the stairs until you get to a corridor. Turn a sharp left and keep going until you see a tape recorder right at the end, sitting upon a table.
ID Card

- Chapter 14: The Massacre at Gerant Manor
- Location: Generator Room
Playing as either Madison or Linda, they will enter a room with a generator. After failing to repair it, they’ll have to look around the room to find the correct parts. Immediately to the right, on a table, is an ID card belonging to Dr Augustine Lieber.
Once you pick up the ID card, the Champion artifact collection will be complete.
The Storyteller Artifact Locations
Estate Letter

- Chapter 2: In The House of Darkness
- Location: Gerant Manor Lounge
As Madison, once you first enter the Gerant Manor’s lobby, head up the stairs and to the left, towards the door on the left-hand side.
Enter through that door into a sitting area, bathed in the moon's light. You’ll know you’re in the right room because there is a piano to the far right of the room.

However, you’re not interested in that area right now – unless you’re after The Huntress rellik – and instead should focus all your attention to the tables just underneath the windows to the left of the room. On one of these tables lies an artifact, the Estate Letter.
Lawyers Letter

- Chapter 2: A Curiosity on Main Street
- Location: Endless Curiosities Shop
As Chris, enter the Endless Curiosities shop first. After a brief cutscene you’ll gain control of Chris while Jaime and Linda go and explore the rest of the shop.

Turn to the left and keep walking forward until you reach a crate with an alarm clock on top of it. Beside the alarm clock is the Lawyer Letter artifact.
Blueprints

- Chapter 4: These Walls Have Eyes
- Location: Atrium Ground Floor (Secret Passage)
Linda, Stan, and Madison will explore Augustine’s atrium on the ground floor.

Head towards the mantle place, where a giant portrait of Archibald Macmillan stares down at you. After interacting with it, you can access a secret door to the right of the room. Tug it open and then, ignoring the cameras, head to the left where you’ll find a stack of blueprints on a counter at the far end of the room.
Fiction Book

- Chapter 6: Beyond The Gate
- Location: Augustine’s Museum/Sanctum
As Linda inside Augustine’s Museum, there will be an area in the middle that consists of chairs, a sofa, and a coffee table.

A book and some very familiar playing cards (make sure to observe them) are on top of the table.
Demonic Statue

- Chapter 6: Beyond The Gate
- Location: Augustine’s Museum/Sanctum
As Linda, still inside Augustine’s Museum/Sanctum, you will see the charcoal statue of a demon with sharp, demonic wings.

Interact with the Akkadian figure, find out more, and unlock the artifact.
Shrine

- Chapter 8: Mystery Manor
- Location: Corridor
After Stan storms off and out the room, players will take on the role of Madison and have no choice but to search the corridors to find him.

Keep progressing through this story section until you reach the top of a hall that descends downwards to a sickly green light. Before heading down there, turn left until you get to a grisly shrine at the end of the hall. You’ll see a tasteful portrait of sickly, black claws scooping up hunks of flesh up into the sky, with a hooded person in a cloak at its center.
Flawed Lamp

- Chapter 8: Mystery Manor
- Location: Film Archives
As Linda, you’ll eventually get the film archives area. This belongs to Augustine and is dedicated to a serious amount of films and film props.

Explore this area as much as you like, but before you interact with the desk at the very end of the room, turn to the right of said desk where you’ll see a lamp sitting on a crate.
Logan Chen Letter

- Chapter 8: Mystery Manor
- Location: Corridor
As Linda, you and Sam will eventually get into a heated argument. At one point, he’ll go through a funny turn, slumping to the floor and giving Linda the choice to search his pockets.
However, you only have the option to choose one item: Sam’s diary or his pouch. In order to unlock this Storyteller artifact, you’ll need to choose the diary.
You might wonder why the artifact hasn’t triggered when you choose the diary, but don’t fret. It will trigger properly when Linda looks at it in the film archives.
Grimoire Page

- Chapter 12: Closing the Noose
- Location: Bedroom
As Madison, progress throughout the chapter until you get to a bedroom you can explore.

On the table, at the back, in the far right corner, is a book called Hidden Meanings. To achieve this artifact, interact with it and read through it all.
Bloodied Ring

- Chapter 14: The Massacre at Gerant Manor
- Location: The Woods
After you have escaped the manor, head further into the woods. Keep on going until you meet a crossroads with a wooden stump in the middle. You’ll know you’re in the right place because to the left of the stump is a campfire, and to the right is a door.

On top of the wooden stump is a bloodied ring you can pick up. Collecting this will complete The Storyteller artifacts collection.
Murder Mill Artifact Locations
Movie Poster

- Chapter 2: In The House of Darkness
- Location: Gerant Manor Sitting Room
As Madison, and after you meet Stan for the first time, you’ll get the option to explore the room. On a wall panel next to a cabinet and the door, is a button that you can interact with.

Once you interact with the wall panel, you can pull it apart to reveal the Murder Mill movie poster. This is impossible to miss, as finding it is the only way to progress into the next area in Chapter 2.
Lost Movie Magazine

- Chapter 3: A Curiosity on Main Street
- Location: Calhern’s Pharmacy
As Chris, before or after you go to Endless Curiosities, you’ll head into the Afterpiece Tonic pharmacy.

To Chris's left is a counter on which, at the very end, rests a magazine about movies lost to time. Read through it to unlock this Murder Mill artifact.
Fanzine Review

- Chapter 6: Beyond the Gate
- Location: Atrium, Top Floor
As Madison, you’ll need to head to the very top of the atrium to explore ways to open the gate on the floor below.

As you do so, you’ll come across a coffee table in the middle of the room. Head towards the table and you’ll be able to interact with a magazine review of the Murder Mill movie.
Oracle of the Omniverse

- Chapter 5: The Phantom of Cedar Steel
- Location: Rivera Garage
Once the cutscene between Robert and Chris plays and they start to investigate more about Frank Stone, players will take on the role of Jaime.

At the very back of the garage is a washing machine. On top of the washing machine is a multi-colored book, looking very much like it was designed for the ‘hippie’ in your life. Interact with it, and find out more about the all-important omniverse.
Deed of Sale

- Chapter 6: Beyond the Gate
- Location: Atrium, Top Floor
As Madison, you’ll need to head to the very top of the atrium to explore ways to open the gate on the floor below.

The room is rectangular, with a cabinet and other trinkets to the left, a coffee table and chairs in the middle, and tables and desks to the right by some windows. Head towards those windows and on the desk by the first window is a white piece of paper. Interact with it and discover more about Augustine’s manor.
Riot Broadcast

- Chapter 6: Beyond The Gate
- Location: Augustine’s Museum/Sanctum
As Linda, you’ll get to explore Augustine’s museum– full of references from Dead by Daylight and its omniverse.

An audio tower stands up horizontally to the right sight of the room. Interact with it by messing with the button, and you’ll hear a detailed broadcast about a riot that followed after a local Murder Mill movie screening.
Broken Super 8

- Chapter 6: Beyond The Gate
- Location: Augustine’s Museum/Sanctum
As Linda, you’ll eventually have to investigate a table at the far back of Augustine’s museum. The table is just behind Madison, and she’ll call you over towards it.
Interacting with the desk reveals a broken Super 8 camera – one that Linda immediately recognizes. Better yet, this one is impossible to miss as it’s needed to progress to the next chapter.
Fake Prop Arm

- Chapter 8: Mystery Manor
- Location: Film Archives
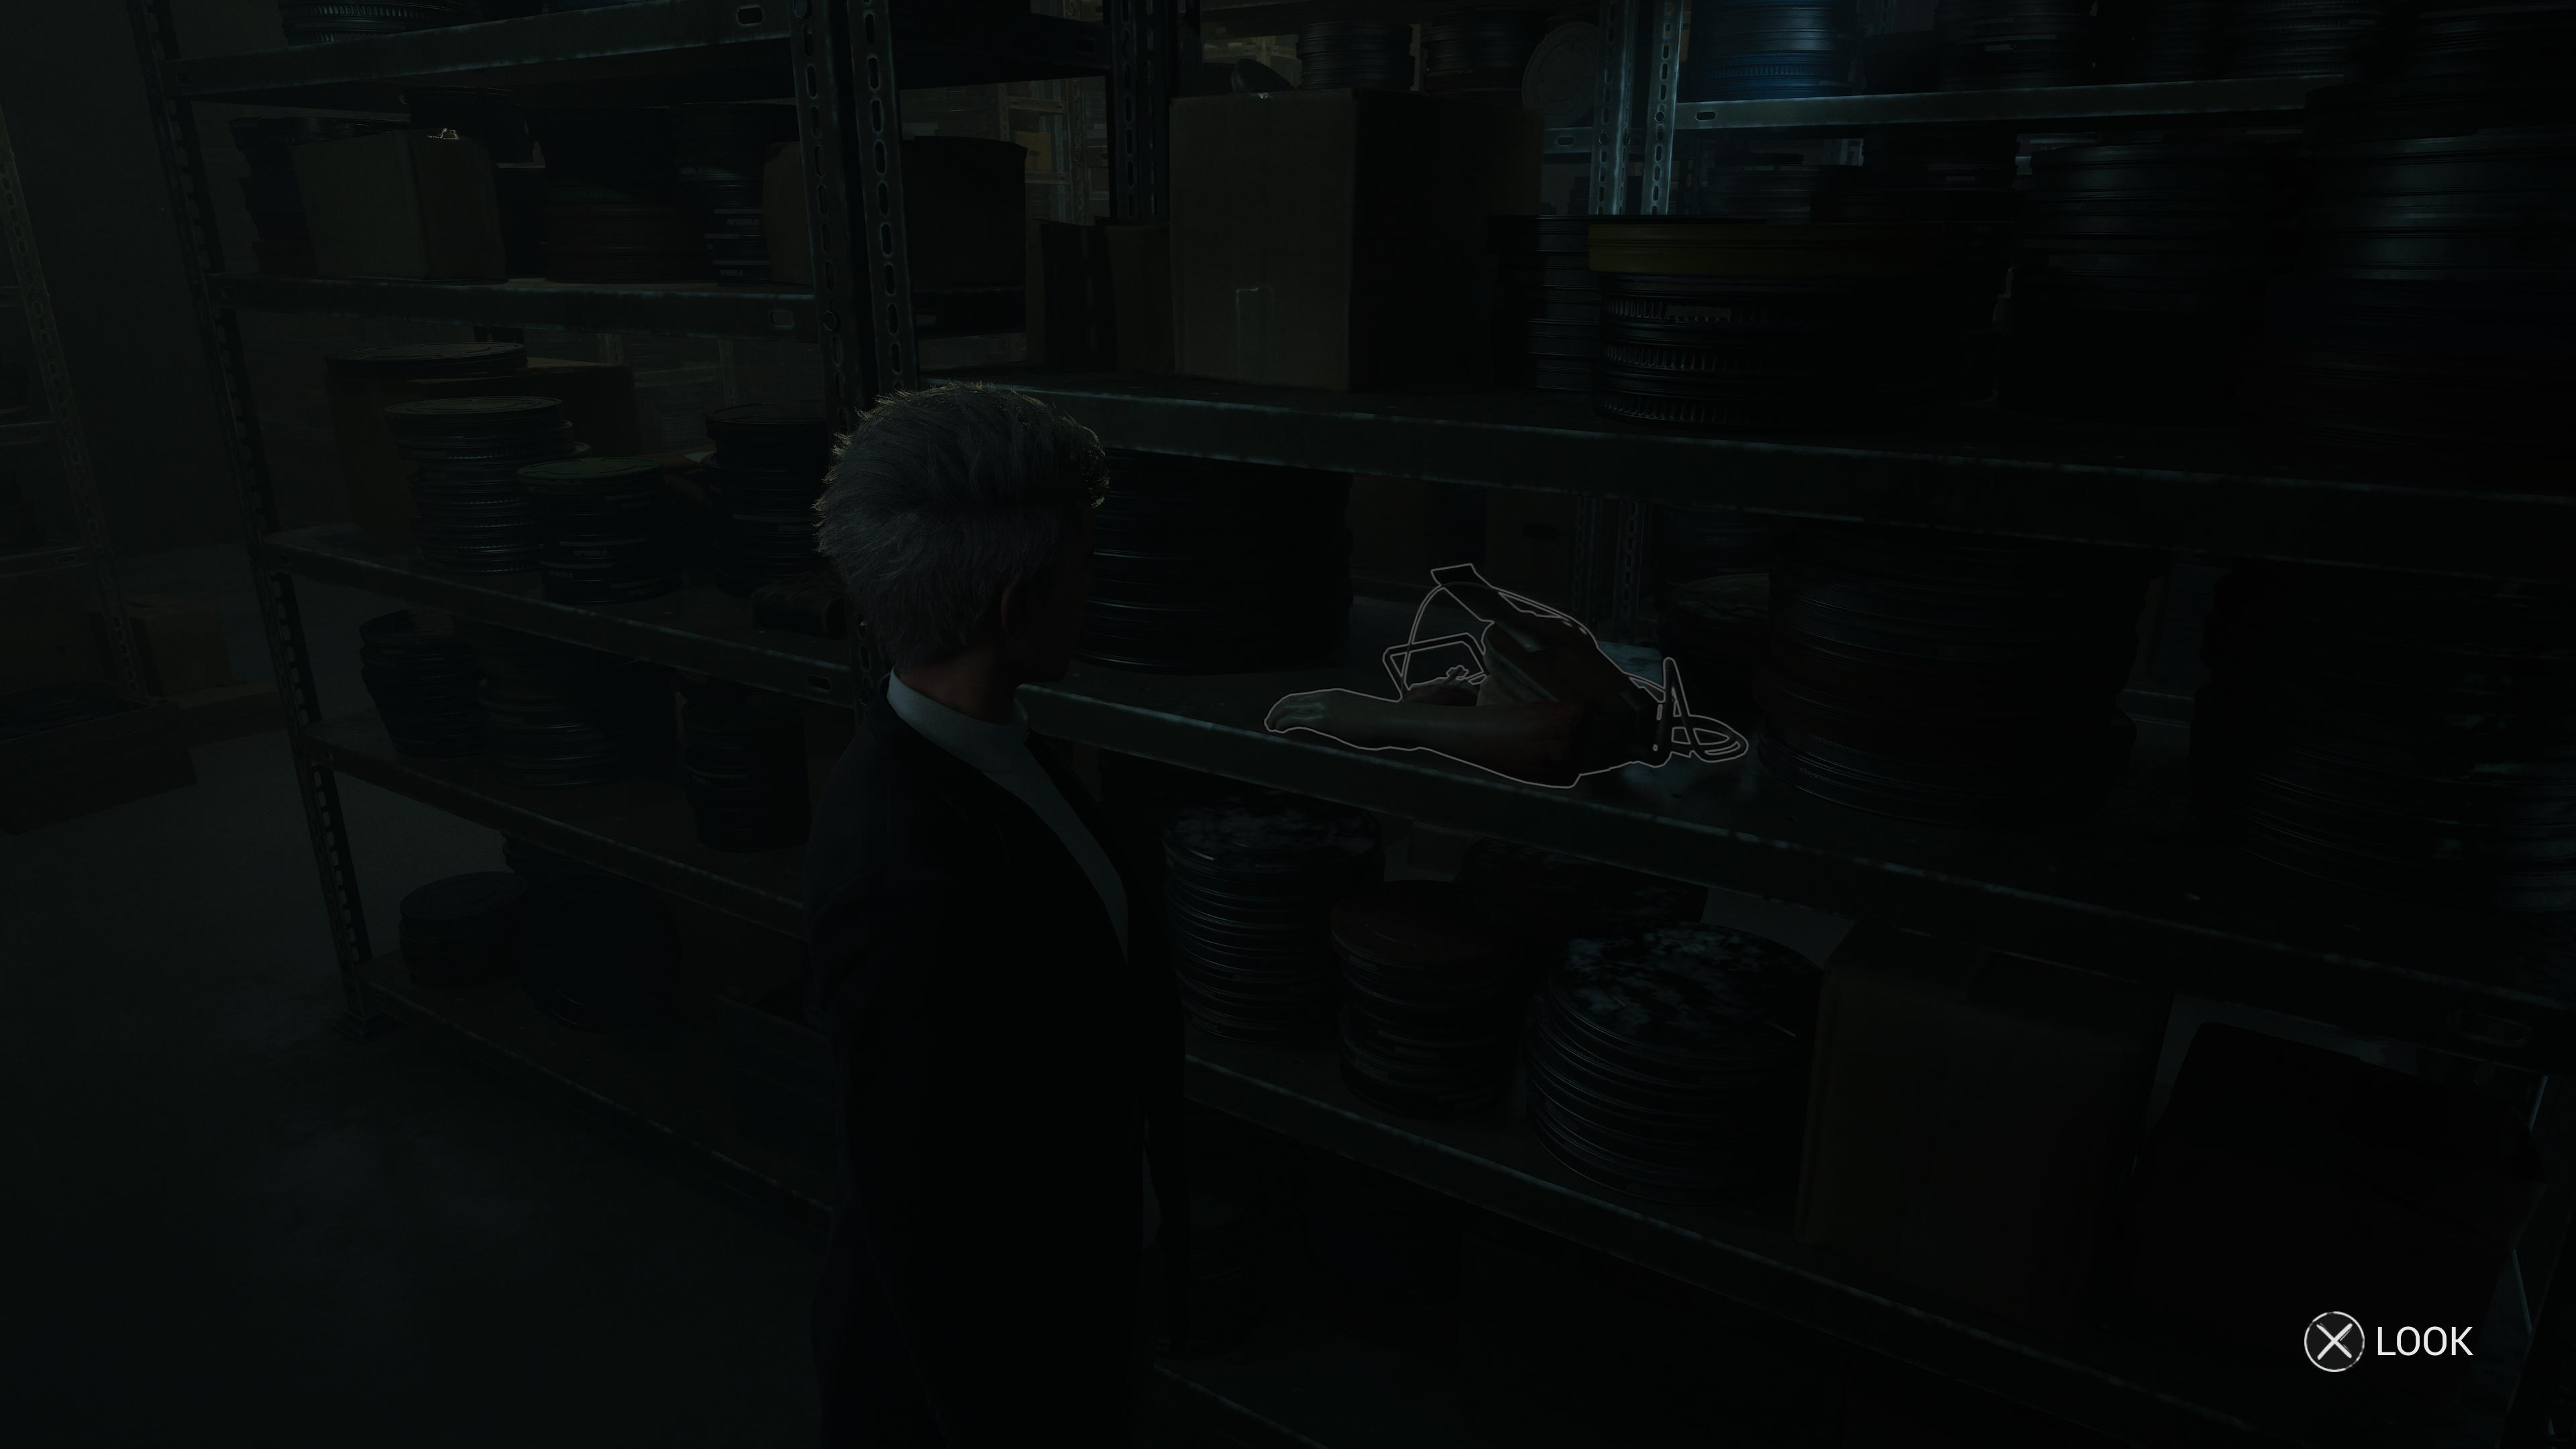
As Linda, you’ll progress throughout the chapter until you reach an unmissable area: Augustine’s film archive. This room is full of shelves, with around 4 different rows on each side of the room (left, right) and a walkway down the middle.

To find this Murder Mill artifact, go to the second row on the right and head straight down until you see a fake prop arm on your left, similar to the one seen in Chapter 3.
Alt Movie Scene

- Chapter 8: Mystery Manor
- Location: Film Archives
Still in the film archives as Linda, examine the camera on the desk at the far end of the room. This is unmissable, as this will lead you to the next area.
But be warned! Do not interact with the camera until you’ve fully explored the film archives, otherwise you’ll miss out on other artifacts and scenes.
T-Shirt

- Chapter 8: Mystery Manor
- Location: Film Archives
As Linda in the film archives, head to the second row of shelves on the left. There, nestled soundly in a crate, you’ll spot these shirts of an alternative film called Murder Mine.

This completes the Murder Mill artifacts collection.

-
Shacknews

 reply
replyAimee Hart posted a new article, All Artifact Locations - The Casting of Frank Stone

