Main story walkthrough - Elden Ring
A complete walkthrough of the critical path in Elden Ring so you can progress through the main story as quickly as possible.
The main story and critical path in Elden Ring is surprisingly short. Those that want to just roll the credits only need to follow a fairly straightforward progression route, which will take them to each non-optional boss and area. To help you finish FromSoftware’s latest title, we’ve got an Elden Ring main story walkthrough that will lay out exactly where to go and what boss to defeat next.
Main story & critical path progression – Elden Ring
In order to complete Elden Ring, players only need to defeat a handful of bosses and visit a few areas. Whether you’re looking to quickly clear the game to unlock a new ending or trying to work out what to do next, below you’ll find the main steps you should be taking.

Now keep in mind, the following will contain heavy spoilers. While I’ll always endeavour to shield you from such things, below you will see boss names, area locations, and other critical elements.
The other thing to note is that this guide is purely for the main story. If you want to unlock all the endings, you will need to do a lot of work talking with NPCs and exploring different areas. One example is Ranni the Witch’s questline, which takes you to several optional areas.
You may also need to spend some time leveling up in order to defeat some bosses. While you can follow the main points below, feel free to deviate from the path in order to explore dungeons, unlock weapons, and otherwise improve your character. Part of this will be farming Smithing Stones to upgrade your weapons.
Stranded Graveyard
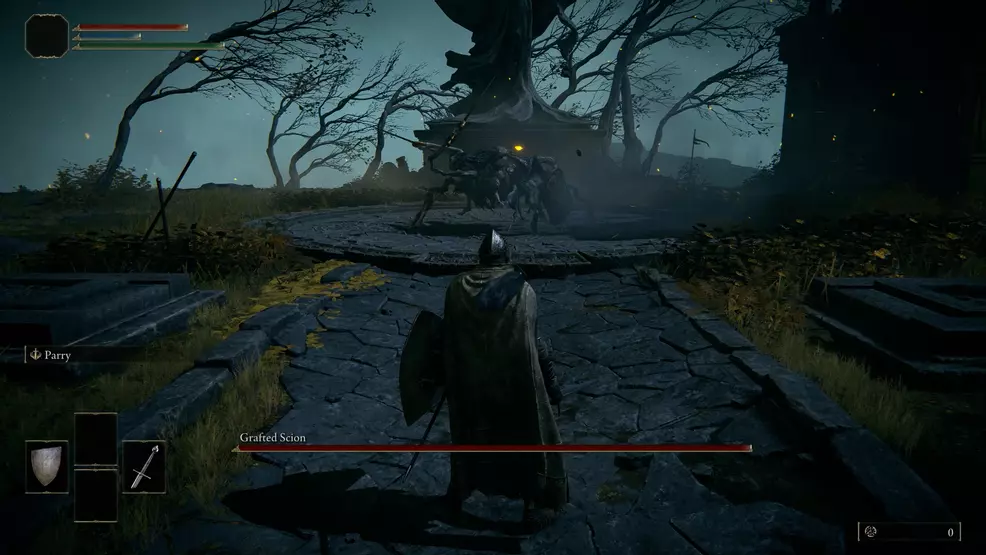
Create your character, enjoy the introduction cinematic, and then work your way through the Church of Anticipation. You will come across the Grafted Scion boss which you can either defeat or let it kill you. Do not worry about dying, this is supposed to happen as you will get transported to the Stranded Graveyard.
When you spawn in the Stranded Graveyard, you will receive your Sacred Flasks, a red one that heals health and a blue one that refills your Focus Points (used for Magic, Skills, and summoning Spirits).
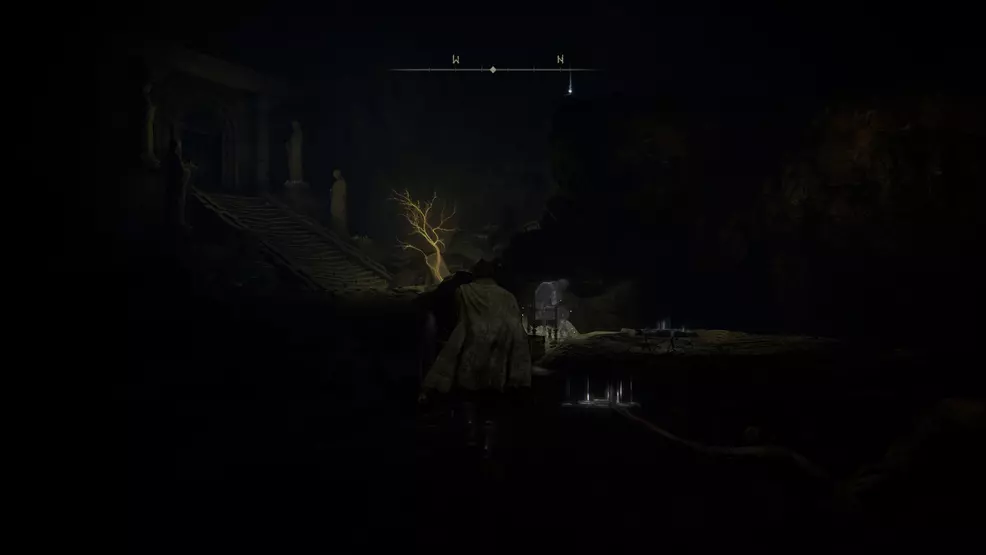
From here, you can either drop down into the cave near the ghost that’s sitting in a chair or continue up the stairs. The cave is the tutorial area, where you can learn the moves and buttons. Take a moment to check out our controls and keybindings guide so you know what button does what.
With the Stranded Graveyard cleared, go up the elevator to finally reach the Lands Between, specifically, an area called Limgrave.
Gatefront Ruins
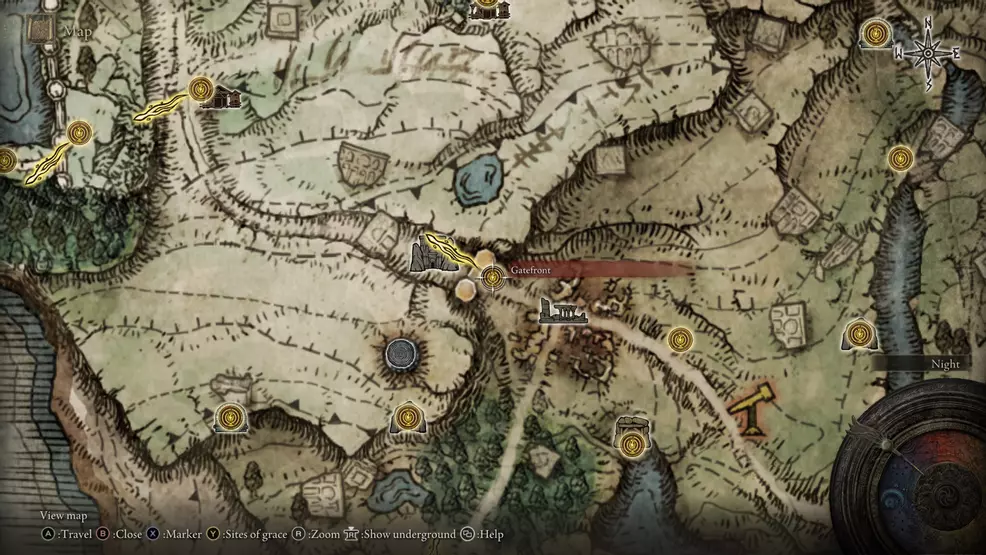
When you first reach Limgrave, you can speak with White Mask Varre, the NPC in front of you, and rest at the Site of Grace. Your next goal will be to reach the Gatefront Ruins to the northeast. As the name suggests, this area has some ruined buildings, but it also has a whole lot of soldiers.
Resting at the Site of Grace at the Gatefront Ruins will summon Melina, who will offer you an accord. Accept Melina’s offering to receive Torrent, the spectral steed.
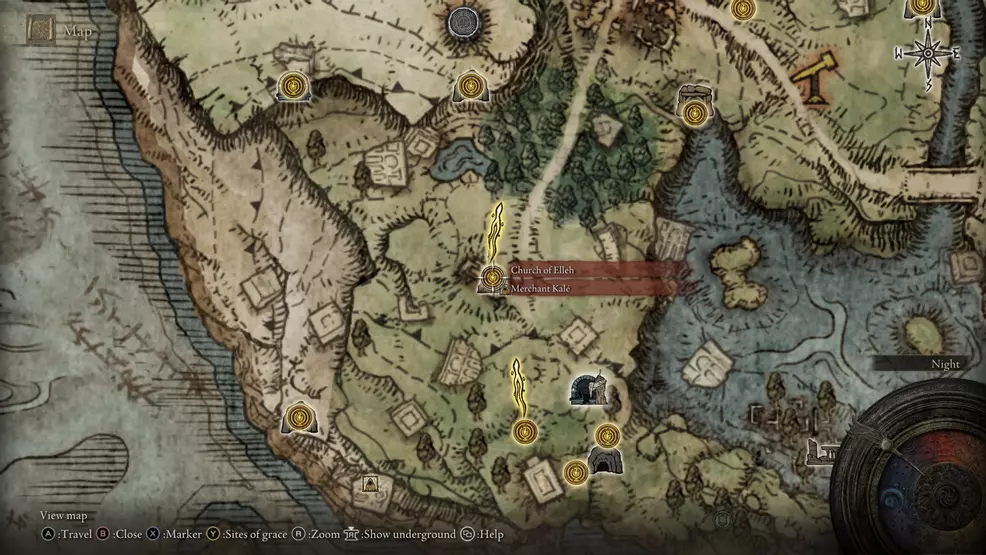
Optional: Go to the Church of Elleh at night and speak with Renna to get the Spirit Calling Bell. You can find this building in the west of Limgrave, just north of the Stranded Graveyard past the Tree Sentinel boss.
Collect the Dectus medallion
The next goal is to reach the Altus Plateau, which can be accessed via the Grand Lift or by working your way up a hidden, cliffside route full of enemies. The quickest way is to use the elevator which requires finding two pieces of the Dectus medallion:
- Left half of the Dectus medallion is at Fort Haight in Limgrave
- Right half of the Dectus medallion is at Fort Faroth in Caelid
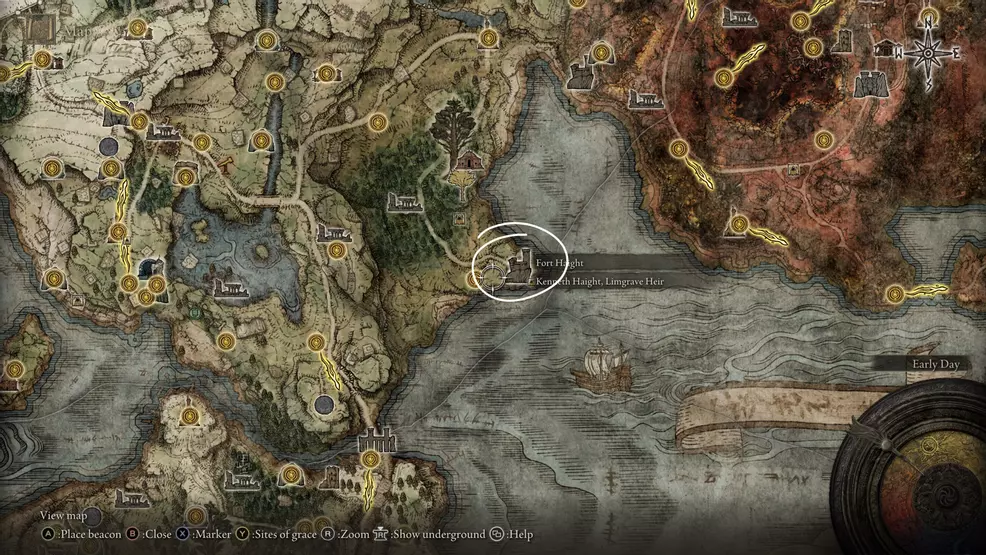
To find the Dectus medallion in Fort Haight, head to Limgrave and then further east into the Mistwoods. The fort is on the southern edge of the area.
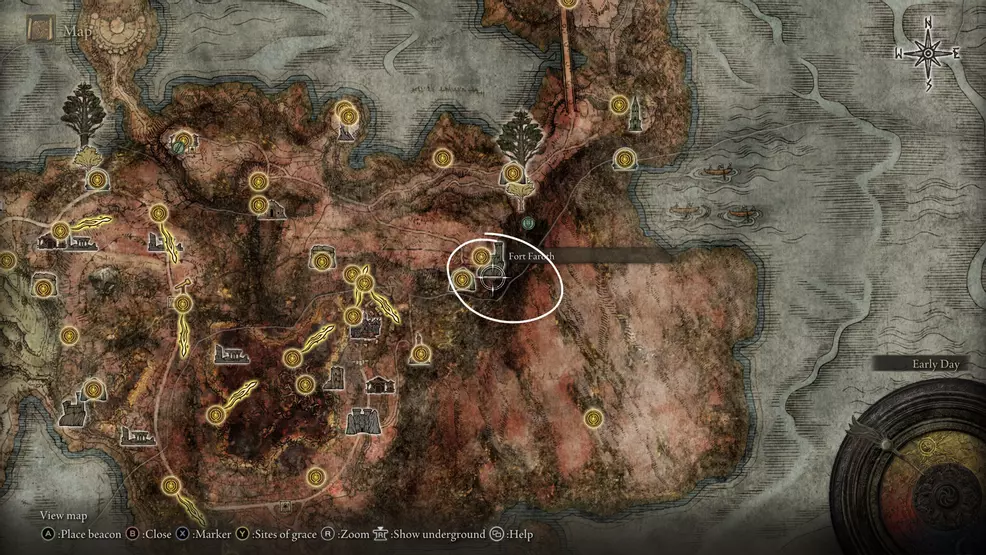
To find the right half of the Dectus medallion, head into Caelid and then to the Dragonbarrow. Look for Fort Faroth in the east, overlooking the beach area and beside the sorcerer tower.
Academy Glintstone Key
The next goal is to acquire an Academy Glinstone Key in order to use the Academy’s seals to move across the broken bridge in Liurnia of the Lakes to reach the great elevator.
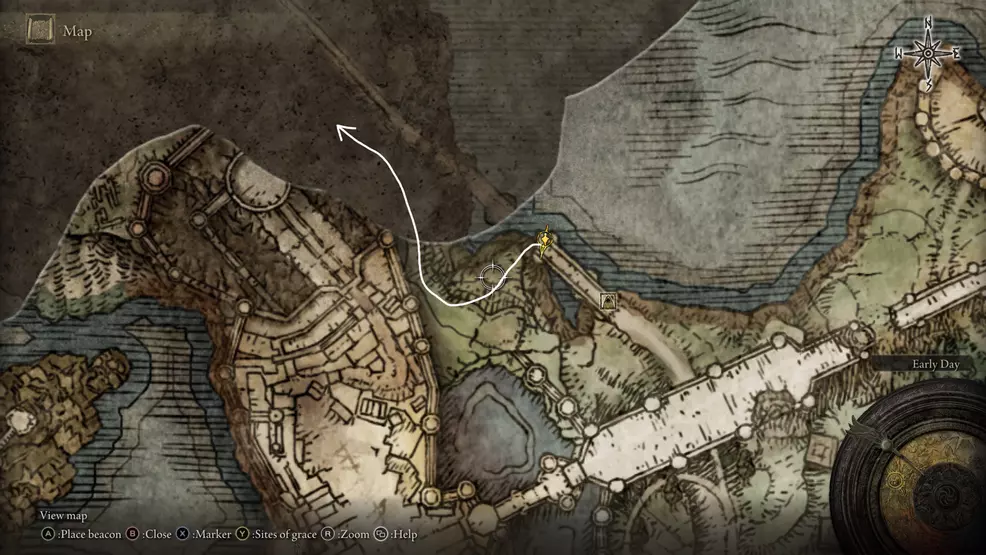
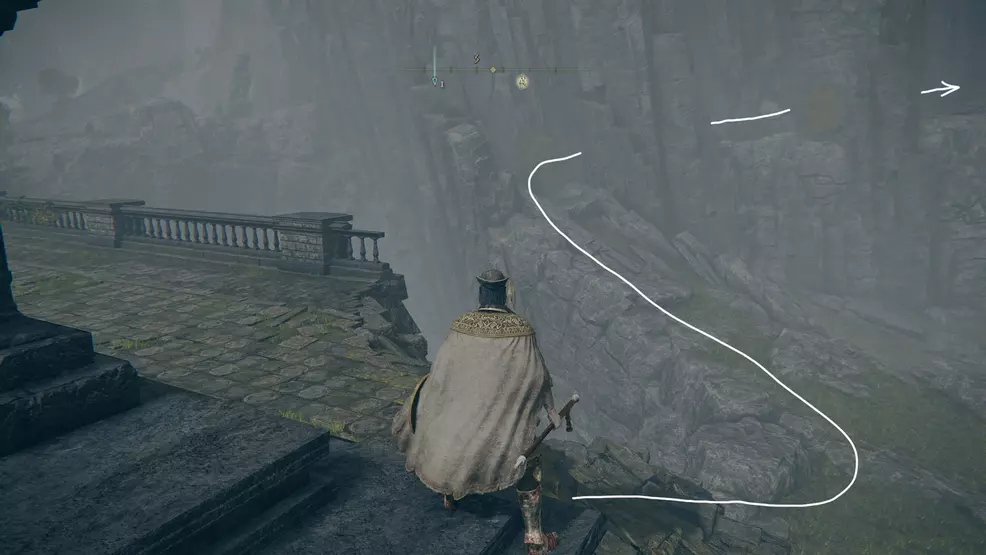
Head back to Limgrave and instead of entering Stormveil Castle, follow the cliff along the eastern side of the castle all the way north. This will circumvent the Margitt the Fell Omen and Godrick the Grafted boss fights, allowing you to access Liurnia of the Lakes early.
When you reach Liurnia of the Lakes, follow the road west and then north as it curves down a ravine. From here, cut across the swampy lake toward the castle high atop a hill in the middle of the area – this is the Raya Lucaria Royal Academy. Activate all Sites of Grace you find along the way for quick travel purposes.
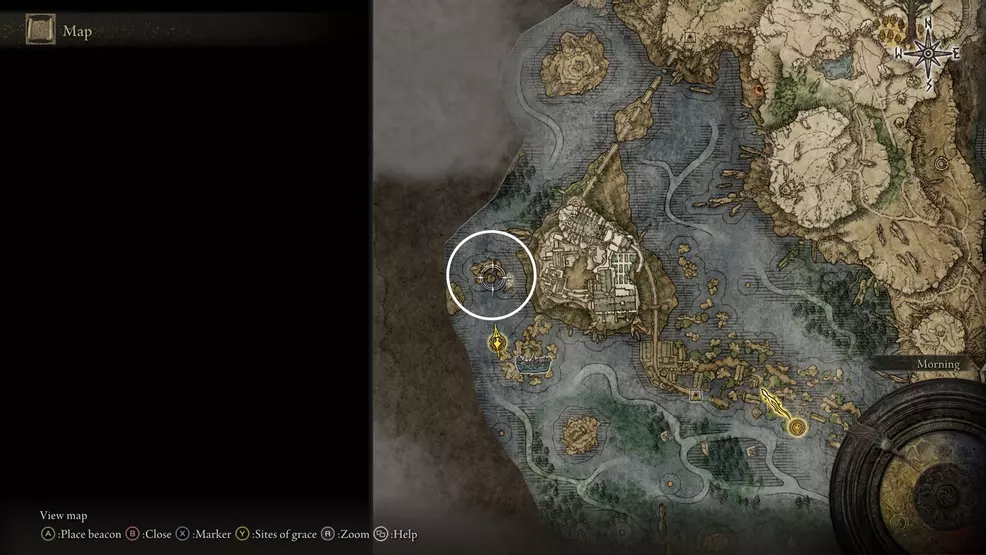
In order to access the Raya Lucaria Royal Academy, you must collect the aforementioned Academy Glintstone Key which is located northwest of the Academy. Look for a cluster of rocks on the map and set a waypoint. The Academy Glintstone Key is on a body behind a dragon. You can sneak behind the dragon and quickly grab the key, though the dragon could very well kill you. You do not need to speak to Thop to make this key appear.
With the key collected, you can head up to the Academy. Travel to the sunken village that’s connected to the south side of the Academy and fight or right your way past the enemies. The route will take you over a bridge toward a magical blue seal. Interact with the seal to be transported to the Academy – this is what the Academy Glintstone Key is for.
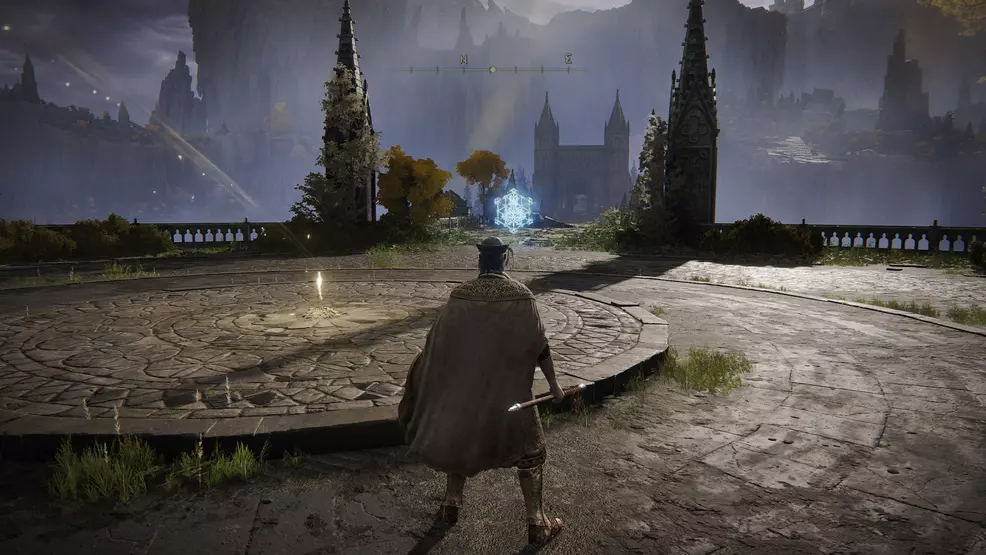
You will be teleported to a junction between two bridges with a Site of Grace. Activate the Site of Grace and then interact with the seal on the northeast to be teleported across the bridge and into the Bellum Highway.
Altus Plateau
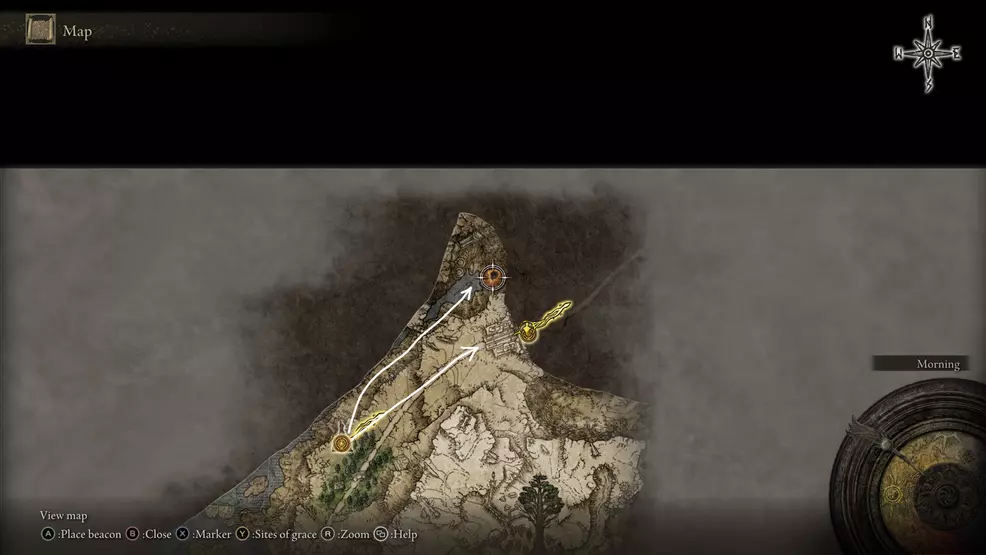
After arriving at the Bellum Highway, you will now need to reach the Altus Plateau, which sits at the top of the Grand Lift. You have two choices here, you can either use the Dectus medallion to ride the elevator (if you’ve collected both halves earlier) or you can fight your way up through the tunnel system from far down in the water. Let’s look at both options.
Grand Lift
Let’s start with the Grand Lift option. If you haven’t already, go ahead and collect both halves of the Dectus medallion which we’ve listed above. These are found at Fort Haight in Limgrave and Fort Faroth in Caelid.

Fort Haight is located in the southeast of Limgrave in the Mistwoods area. It’s on the southern cliff. This is a small fort with only a handful of foes. Defeat the foes and go up the ramp to reach the top.

Fort Faroth is located in Caelid, specifically the Dragonbarrow area.
Ravine-Veiled Village
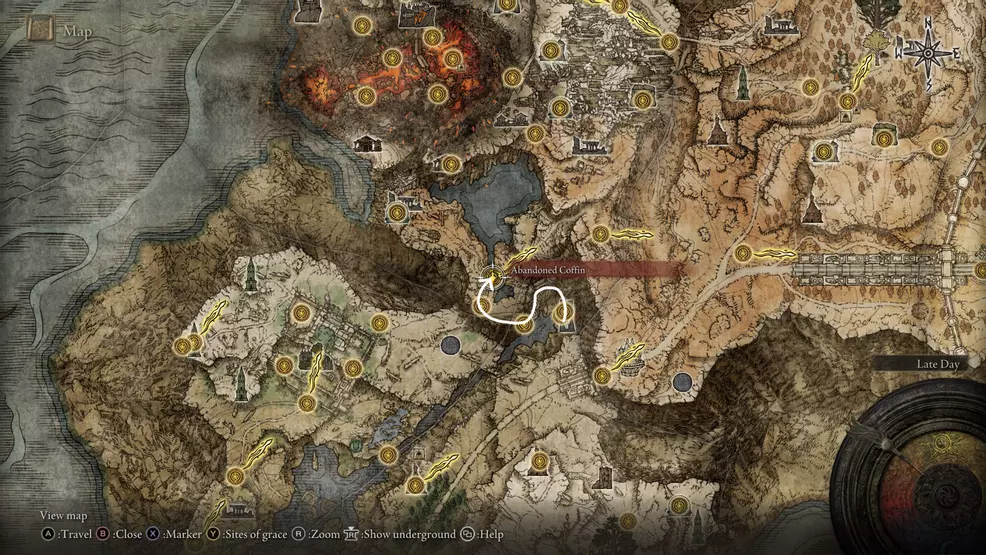
In the event you don’t want to get the Dectus medallion, you can always fight your way through the Ravine-Veiled Village and up the cliffs. To reach this location, start at the Bellum Church in the Bellum Highway. On the northwest side of the church will be a hole in the ground that leads down to the water.
Go down the hole, along the road on the cliff, and follow the water as it goes deep inside the ravine. Inside this ravine are several pods that spew poison. Avoid them and stick to the right-hand side to find a Site of Grace on a wooden platform beside a ladder. This is the starting point for ascending to the Altus Plateau.
From here, you will just need to climb the ladder and fight your way through several caverns, across precarious edges, and up more ladders. It’s a challenging route, but one that contains bosses and useful gear. There is really one one route through, with some side hallways. You're basically always looking for a ladder or an elevator.
Once you defeat the boss (the Magma Wyrm), you will take another elevator up and arrive in the Abandoned Coffin area in the Altus Plateau. From here, you're free to gallop across the plains to reach the other side of the city.
Entering Leyndell, Royal Capital
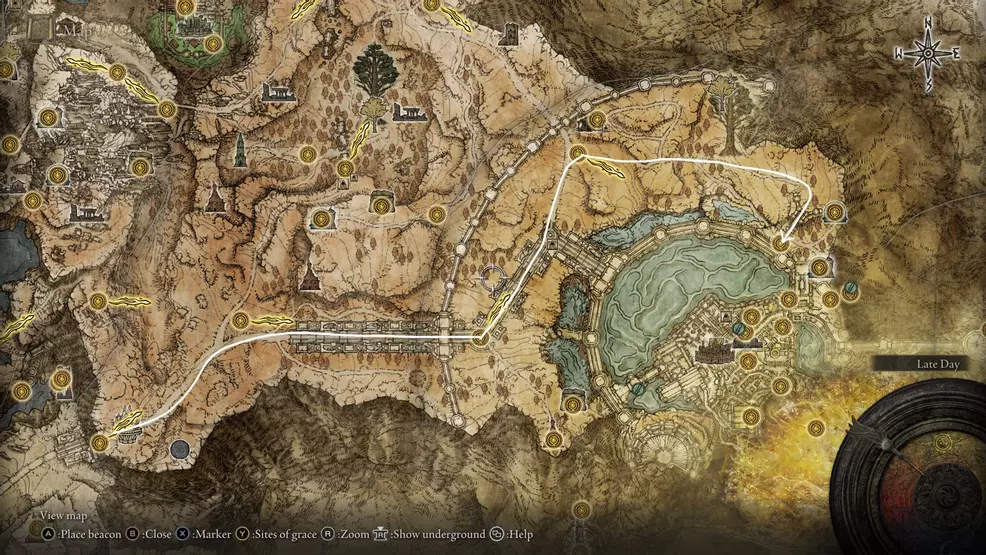
Once you reach the Altus Plateau, the next goal will be to reach Leyndell, Royal Capital. The Capital is the central location in Elden Ring, where the ruling demigods reside. To reach this location, you will need to travel northeast from the Grand Lift and then east up the large steps toward the center of the map.
The stairs that lead up to the mighty walls of the city are full of enemies, with some powerful foes waiting at the top. The best strategy is to simply run past them as there is a Site of Grace on the other side of the wall.
When you reach the inner Site of Grace, you will need to travel around the moat of the inner wall to the northeast location. There is a bridge here that connects to Leyndell, Royal Capital, but it is defended by a Draconic Tree Sentinel, an extremely powerful boss.
After defeating the Draconic Tree Sentinel, you can cross the bridge toward Leyndell, Royal Capital. However, if you’ve rushed to reach this location, you will find a golden fog blocking your path. It’s at this point you must defeat two bosses that hold a Great Rune. There are four bosses you could defeated:
- Godrick the Grafted
- Rennala, Queen of the Full Moon
- Starscourge Radahn
- Rykard, Lord of Blasphemy
If you haven’t already, pick two bosses to defeat. I would recommend Godrick the Grafted and Rennala, Queen of the Full Moon, as these are two of the early-game bosses. If you’re up for a fight, you could attempt Starscourge Radahn in Caelid, as this will allow you to unlock the Mimic Tear Ash.
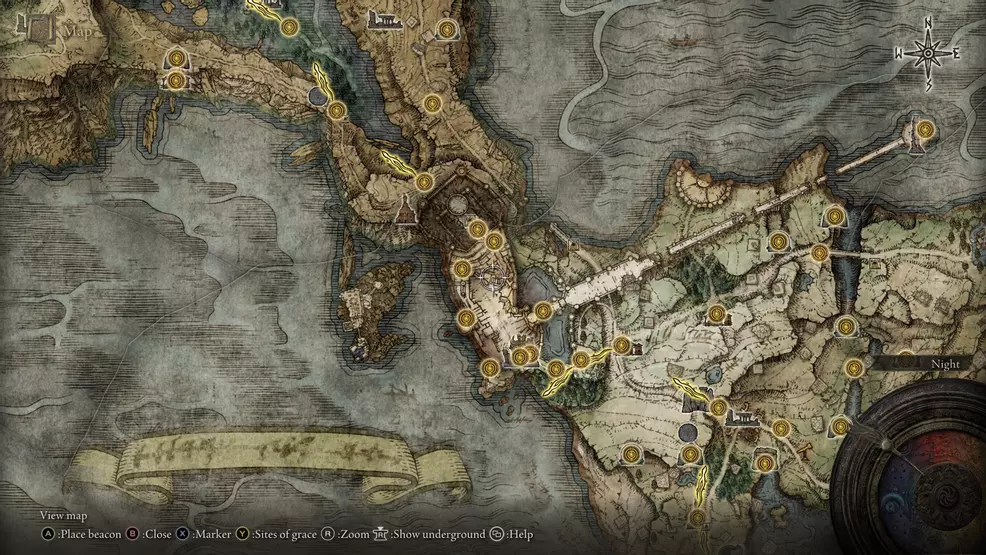
Godrick the Grafted is located in Castle Stormveil in Limgrave. You will need to defeat Margit, the Fell Omen before you can access the castle.
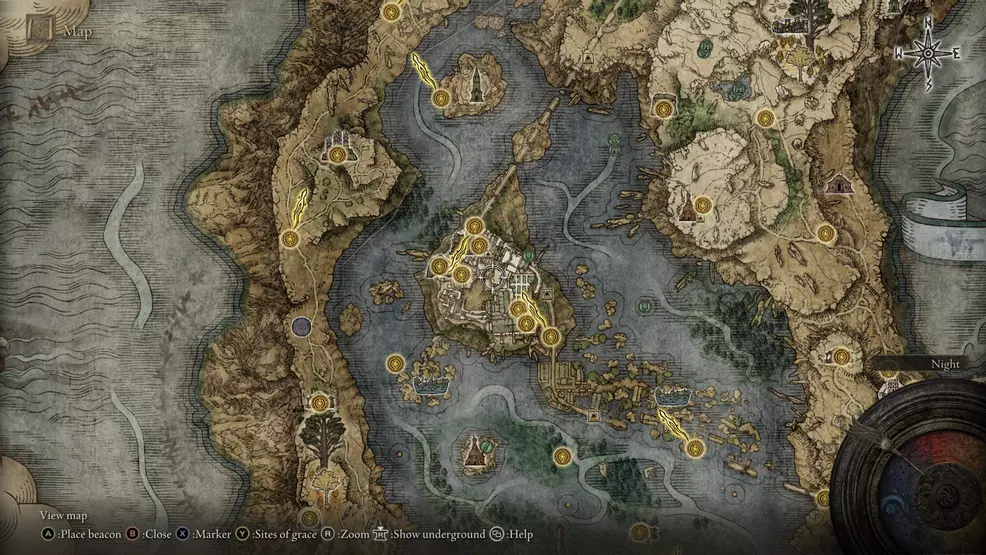
Rennala, Queen of the Full Moon is in the Raya Lucaria Academy. You will need to defeat Red Wolf Radagon to reach her. This boss drops one of the Memory Stones, which will increase how many spells you can equip at once.
Starscourge Radahn is found via Redmane Castle in the south of Caelid. Arriving at this castle after you reach Altus Plateau will treat you to the Radahn Festival, where you’ll encounter a bunch of friendly NPCs. These NPCs will help you during the fight against Radahn.
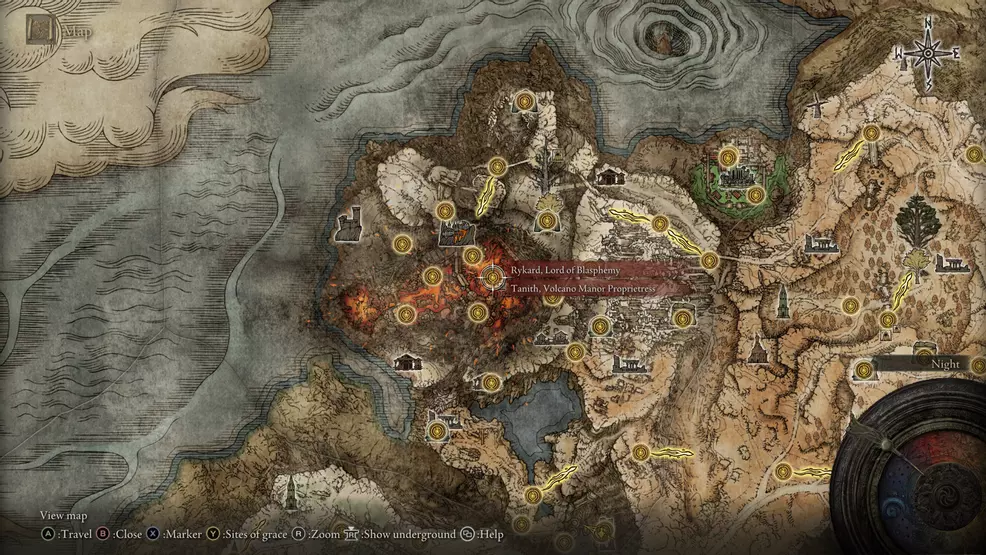
As for Rykard, Lord of Blasphemy, this monstrosity is found in Mt Gelmir, a high-level area in the northwest of the map. This location can be accessed via Altus Plateau or by invitation from Rya after you help her in Liurnia of the Lakes.
After you’ve defeated two of the aforementioned bosses and powered up their Great Rune at their associated Divine Tower, you can progress into Leyndell, Royal Capital. If you’re having trouble empowering the Great Rune, look at the rune in your inventory and choose the Show More Info button to read where it needs to be charged.
Fighting through Leyndell
Gaining access to Leyndell, Royal Capital is just half the battle. The next challenge will be actually navigating the twisting roads that lead to your next boss. The goal you are working toward is the southwest side of the city, where you can climb the dead dragon and then the Erdtree branches. Check out the video below by FightinCowboy for a thorough exploration of the city.
Once you climb the Erdtree branches, you will need to fight Godfrey, First Elden Lord. This golden phantom has no boss fog door, so prepare for a surprise. When he is defeated, continue onward to find another Site of Grace before a large set of stairs up to the next major fight, Morgott, the Omen King.
Defeat Morgott, the Omen King to be able to access the next major area, the Mountaintops of the Giants. To reach this location, start at the Avenue Balcony and head east through the city. Pass through the large doors and use the stairs that curve up. Ride a huge elevator up to the Forbidden Lands.
Mountaintops of the Giants
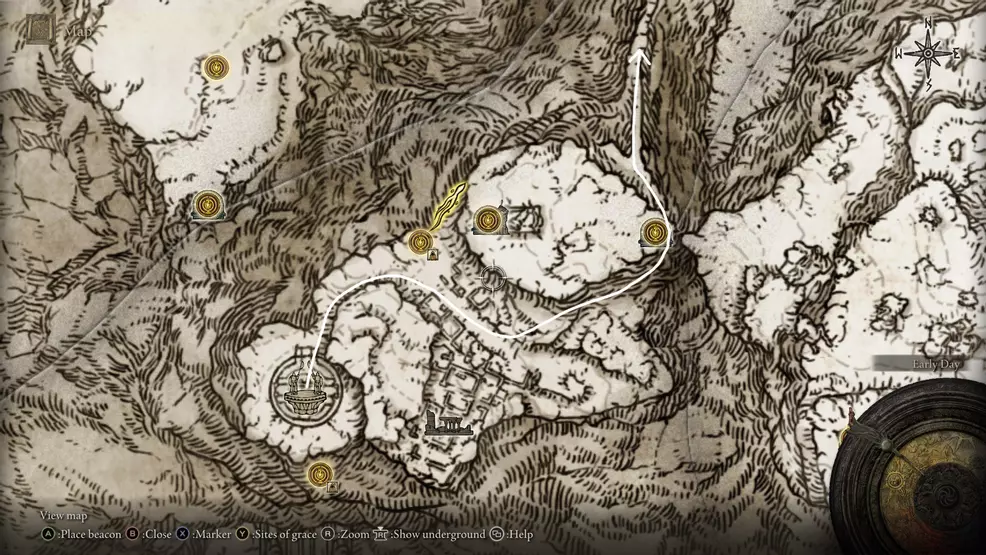
At the top of the elevator you will enter the Forbidden Lands. This is a thin strip of snowy earth that will take you to the Grand Lift of Rold. Ascend this new elevator to reach the Zamor Ruins. From here, the path is rather singular. You will need to run across an extremely thin wall while being fired upon by a giant. Use the notches along the route to avoid being hit.
Continue to work through the area, following the frozen river to the east to gain access to the Freezing Lake. Head south across the lake, fight through the army, and cross another thin bridge, this one made of a chain.
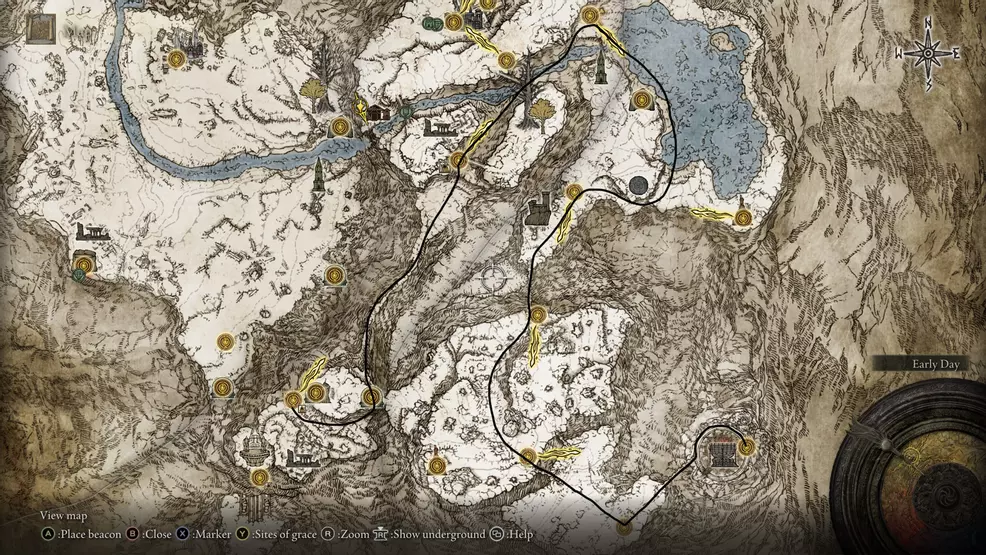
Rest at the Giant’s Gravepost and then follow the main path southwest. You’re looking to reach the center of the area where the giant chasm is. Use the chains to cross into the southern area of the Mountaintops of the Giants. It’s here you’ll find the Fire Giant.
Defeat the Fire Giant and then, once again, climb across the chains to reach the Forge of the Giants. Move clockwise around the edge of the forge to reach another Site of Grace. Resting at this Site of Grace will summon Melina.
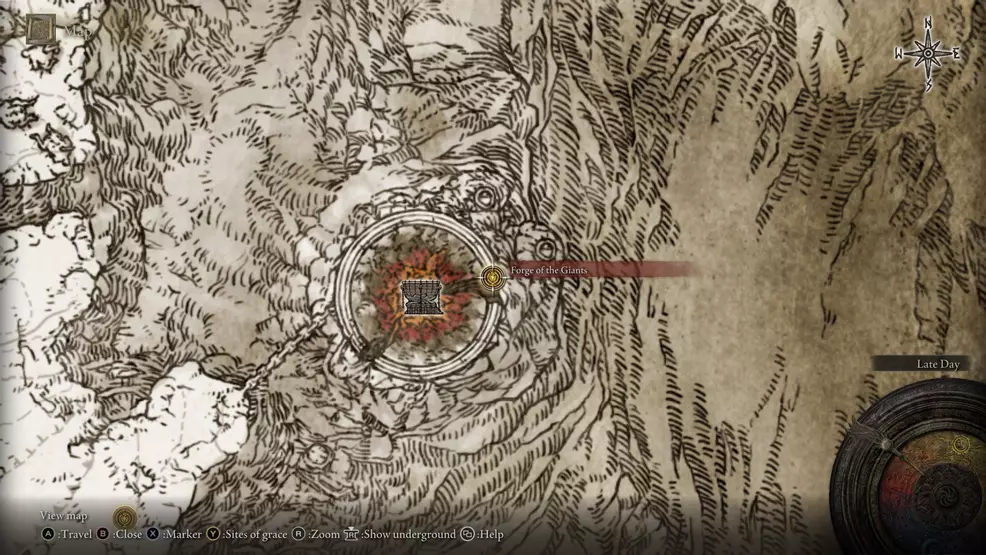
When Melina talks to you, she may offer you a choice depending on your progression and choices through the story. This is a point of no return. Making a choice will propel you into the end-game and limiting your access to Leyndell, Royal Capital. If you haven’t already, be certain you’ve done everything you want to do in Leyndell. Note that you can still access the sewers.
As soon as you’re ready to progress, speak with Melina, choose the option that best suits your desired ending, and then you will be transported to a new location.
Crumbling Farum Azula
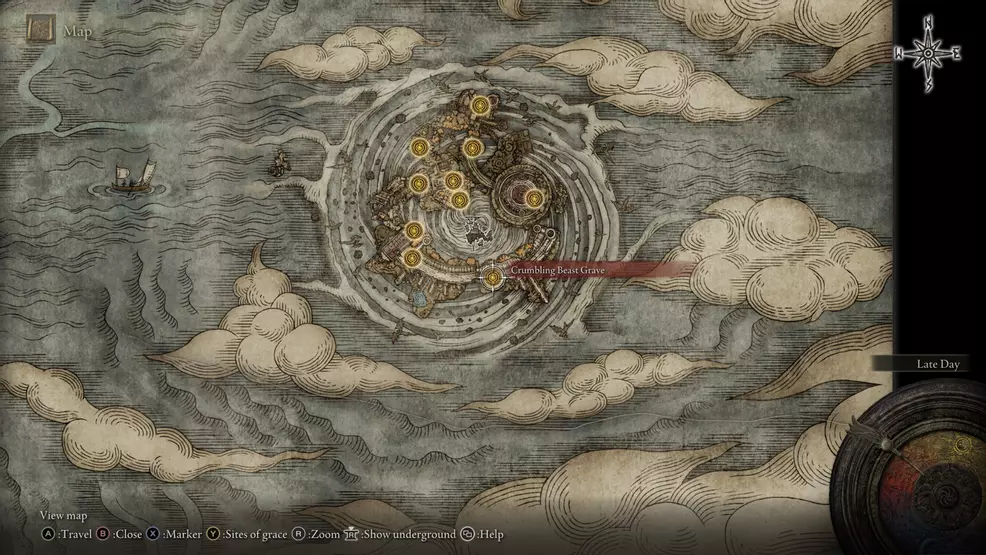
After making your decision, Melina will transport you to the Crumbling Farum Azula. This location is packed full of strong foes, including multiple dragons. It’s also an opportunity to collect Smithing Stones to fully upgrade your weapon.
There are only two non-optional bosses in this location, the Godskin Duo and Maliketh, the Black Blade. Both are required in order to complete this area.
Once Maliketh is defeated, you will be transported to Leyndell Capital for the final push to become the Elden Lord.
The Erdtree
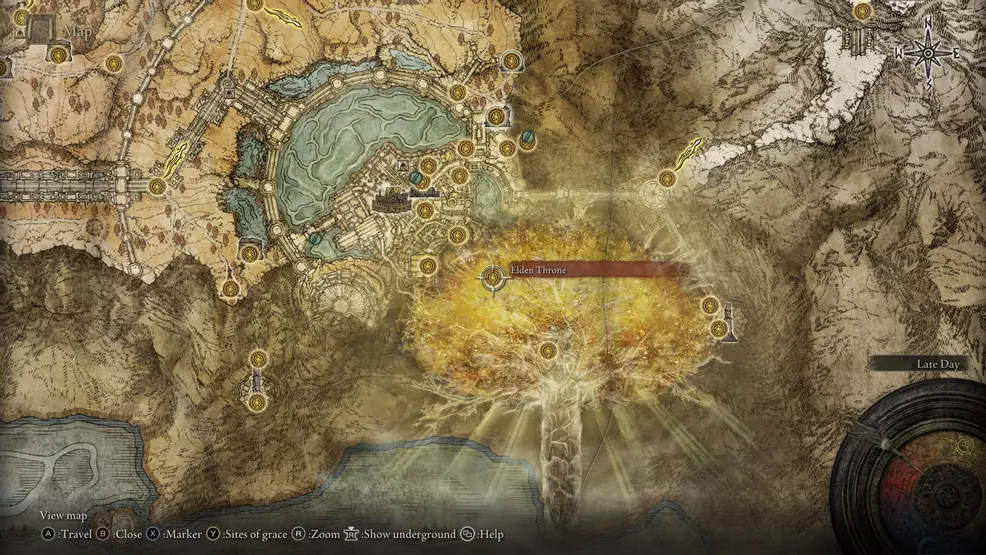
Work your way through the Leyndell Capital to where you fought Morgott. Along the way you will need to fight Gideon, the All-Knowing. When your pal Gideon is defeated, continue onward to fight Godfrey, the First Elden Lord.
When Godfrey is defeated, go up to the Erdtree and interact with the fog to fight the final bosses of Elden Ring. You will need to defeat Radagon of the Golden Order and Elden Beast.
When these two bosses are defeated, you have a choice: finish the game or continue exploring the map. Turn around and rest at the Site of Grace to activate it as a fast travel point. You can now travel back here when you’re ready to finish.
To finish the game, interact with the statue or Marika or one of the summon signs on the ground. Depending on the choices you made throughout the game, different endings will be available to you. Once you interact with a summon sign or the statue, the game will officially end and New Game Plus will begin.
The main story in Elden Ring only requires players defeat a handful of bosses. Despite this, the critical path can take a bit of time, especially if you encounter some roadblocks and need to go elsewhere to level up before you progress down the main route. There’s a lot more to discover in the game, so stop by our Elden Ring strategy guide for more information on NPC quests and weapon locations.
-
Sam Chandler posted a new article, Main story walkthrough - Elden Ring
-


