How to use Autoscroll in Super Mario Maker 2 Course Maker
Use Autoscroll to encourage players to run through your custom Course Maker levels with haste in Super Mario Maker 2.
Among the many functions of Course Maker in Super Mario Maker 2 is the Autoscroll feature. As its name implies, it allows creators to have their levels scroll side-to-side automatically, giving some gentle encouragement for players to reach the end zone. Here's how to use Autoscroll in Super Mario Maker 2.
Super Mario Maker 2 Course Maker | How to use Autoscroll
The purpose of Autoscroll in the Super Mario Maker 2 Course Maker is to compel the player into action. When the level scrolls from left to right, the player character is forced to move and complete the Clear Condition or face outright failure.

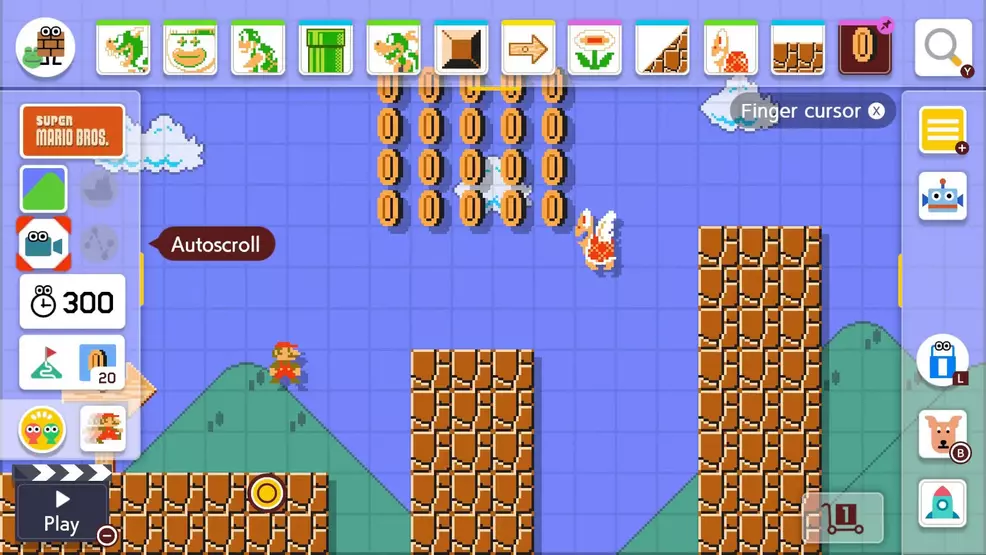
Like many of the tools offered in Course Maker, Autoscroll is tied to a button found in the taskbar. Specifically, it's the button shaped like a camera with eyes, found right in the middle of the left-hand taskbar.
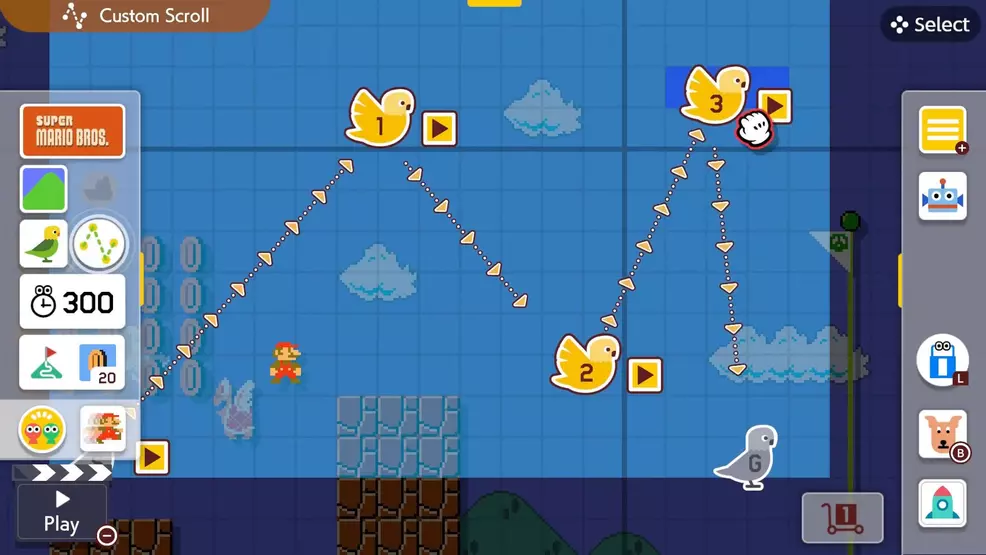
Press the Autoscroll button to reveal five settings: None, Slow, Normal, Fast, and Custom. Each of these allow players to fine-tune the speed with which the level should scroll. As might be expected, the Custom setting allows uers to change the scroll speed in different areas.

Setting a scroll speed is easy. All players need to do to set Autoscroll is to place the Autoscroll icon on the Course Maker grid, then orient the arrows where the camera should scroll to. Note that if the camera scrolls too far from the player, they will fail the course, so try to keep things fair.
The Autoscroll function in Super Mario Maker 2 Course Maker is just as easy to use as the rest of the game's level creation features. Simply use the Autoscroll button and set the desired camera speed and movement path. To learn even more about the game's robust level creation tool, be sure to browse through Shacknews' collection of Super Mario Maker 2 game guides.
-
Kevin Tucker posted a new article, How to use Autoscroll in Super Mario Maker 2 Course Maker


