How to mark quest locations on the map in The Sinking City
Learn how to mark quest locations on your map so you can find things easier in The Sinking City.
As you explore the city of Oakmont, you’re going to quickly realize that Frogwares’ latest title doesn’t hold your hand at all. In fact, it’s completely up to the player to figure out where they need to go next, with many quests only giving you a general area, and some street names. There are no pre-determined waypoints on the map, which means you’ll need to find each location yourself. In this guide we’ll discuss the easiest way to mark quest locations on the map, which should make finding areas much easier.
How to mark quest locations on the map in The Sinking City
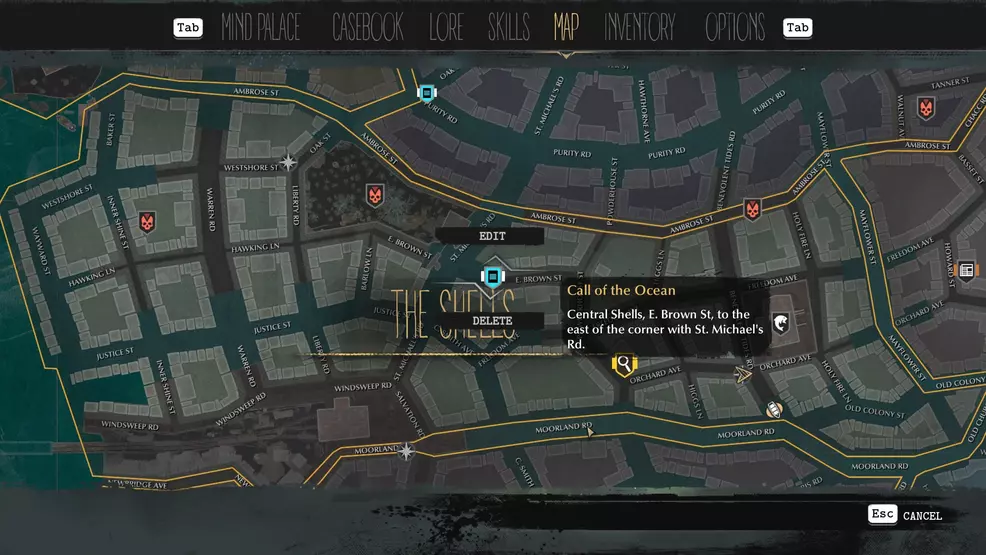
After you learn of a quest’s next destination, you can mark it on your map, which will add a waypoint to your compass, making it much easier to track your way across the winding streets of Oakmont. To add waypoints and mark quest locations, you’re going to need to open up the map.

With the map opened, find the general location that you want to mark and then press the button outlined on the bottom of your screen to Place Mark. On PC this button is Space Bar by default. You can press the button to mark things on the map to have an entire list of the various objectives you have on your current quest pop up. This will allow you to more easily follow directions for streets and other important information.
When you’ve found the spot that you want to mark on the map, simply press the mark button once more, and it will add the provided marker on the map, making it easier to follow on your compass. Now that you know how to mark quest locations on the map you can return to our main The Sinking City hub for even more help, or check out our The Sinking City review, where we discuss our likes and dislikes about the game. Also, be sure to follow Shacknews on Twitter to keep up with all our newest content.
-
Josh Hawkins posted a new article, How to mark quest locations on the map in The Sinking City


