Xbox One X - How to Turn on 4K
The Xbox One X can deliver 4K right out of the box, you just need to make sure it’s all setup correctly.
So you’ve taken the plunge and gotten yourself an Xbox One X – welcome to the club! With your 4K television all set up, and your Xbox One X plugged in, you now need to know how to turn on the 4K and actually see all those pretty new textures before your very eyes. Don't waste your time digging around in the settings, let us show you how it's done.
How to Turn on 4K
After turning on your Xbox One X and going through the setup steps of selecting your language, signing in to your Xbox Live account, and installing the updates, you will need to ensure all the 4K settings are on and working.
To do this, press the Xbox button on the controller to bring up the Guide. Navigate to the far right Systems tab and select Settings from the list.

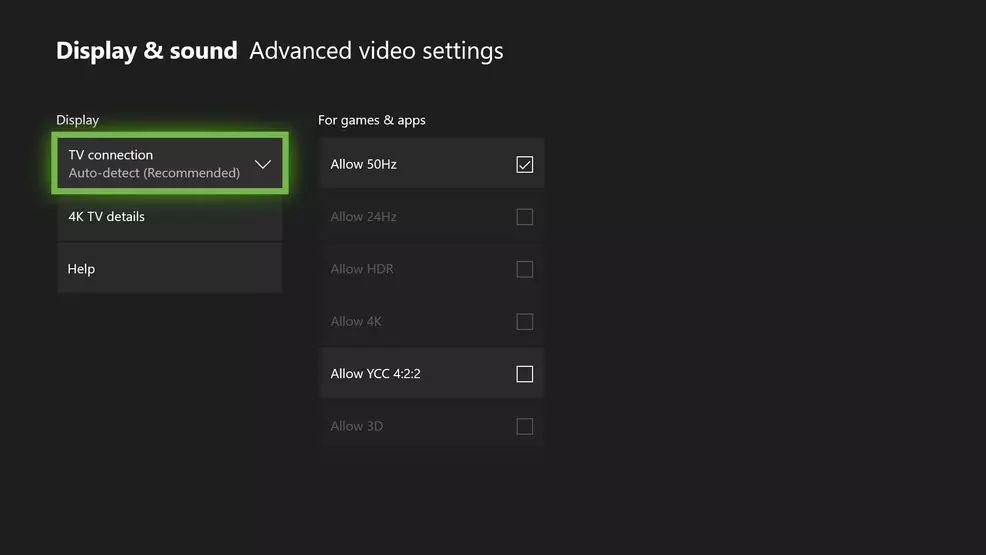
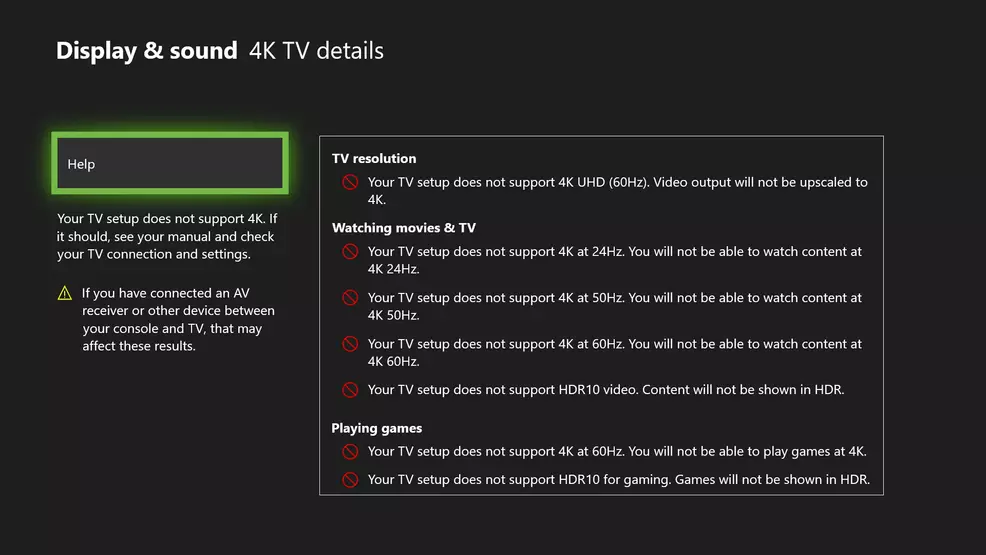
Go to Display & sound, select Video output, then select Advanced video settings. This menu lets you choose whether to allow your Xbox One X to run at 50Hz, 24Hz, whether to allow HDR, 4K, YCC 4:2:2 or even 3D. You can even use the “4K TV details” button to check what your TV or monitor is able to output.

As you can see from the screenshot, my old monitor does not support 4K or HDR10 – so I’m in need of an upgrade. Thankfully it’s Black Friday soon, the perfect time to pick up a slick new TV or monitor.
Now that you’ve got your Xbox One X setup to output 4K images – and provided you’ve downloaded the 4K game content – anytime you boot up an Xbox One X Enhanced game, it will automatically use the 4K textures and run at the best possible frame rate. In the event you shift your Xbox One X around or upgrade to a different TV, make sure you take the time to check the 4K settings.


